Thursday, March 31, 2011

March 31, 2011

Well, the rain is coming down like crazy and has been for the past two days, making gardening difficult for all but the most crazy among us.  Now normally I'd be one of those out there in my rain gear doing what I could in the garden, but since I got my chicks, I've had better things to do with my time.

So, this post is going to be about the chicks so far.  Mostly, it's going to be about the pecking order ritual. I keep telling folks you could write a paper on this stuff, and that's just what I'm doing.

With my first three chicks, I found it interesting that the most active chick became the alpha, for lack of a better term.  The others would, after a while, simply let my Welsummer just peck at them, while they literally turned the other cheek.  What I didn't see was how the second fiddle got that job.  Sure the third in line was so docile that she simply sat there and did nothing while the others took their places, but all I saw her doing was staying as close to the alpha as possible.  That couldn't be a tactic, could it?

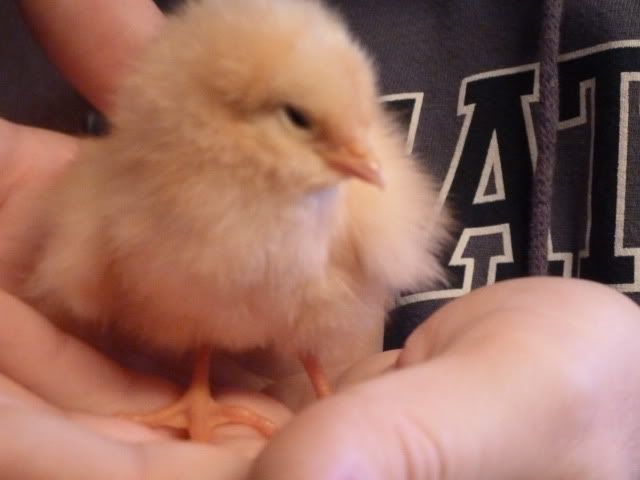
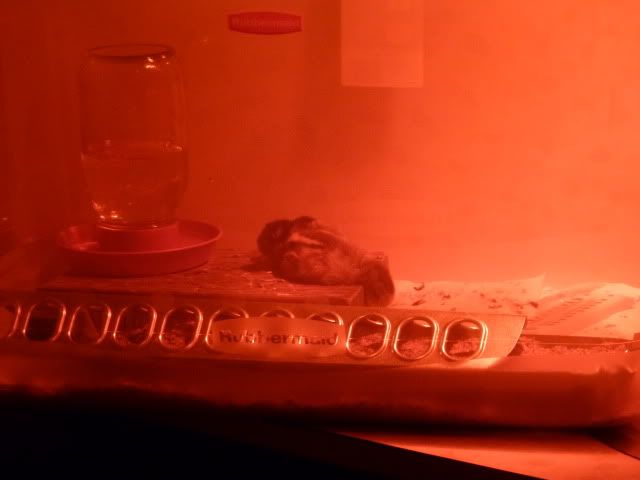
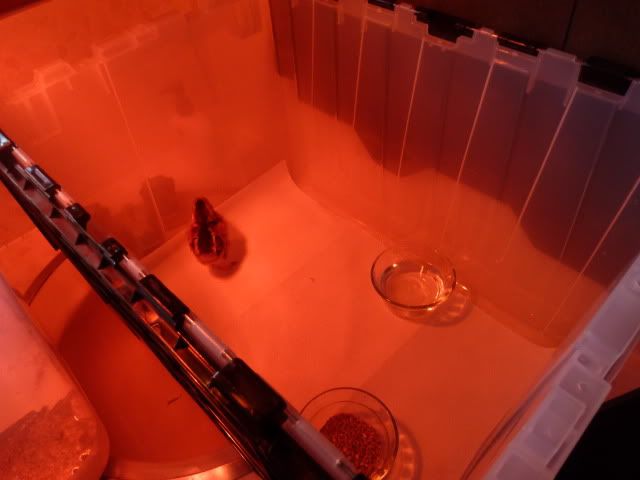
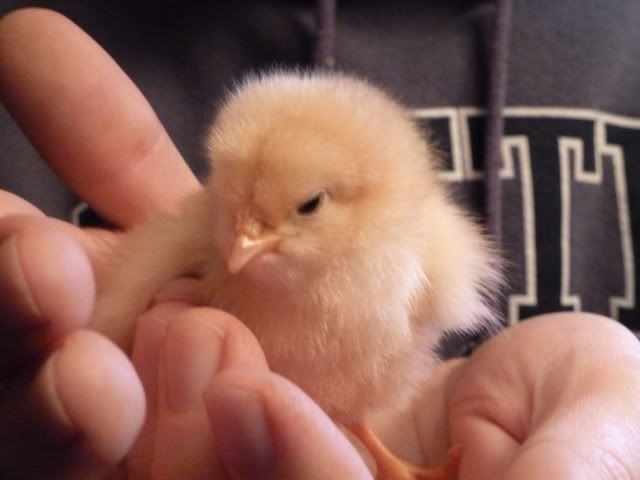
While all that was interesting, I didn't realize just how fascinating it all was until the Buff Orpington entered the picture.  I chose her because she was running around, best not to get one too lethargic as they could be sick.
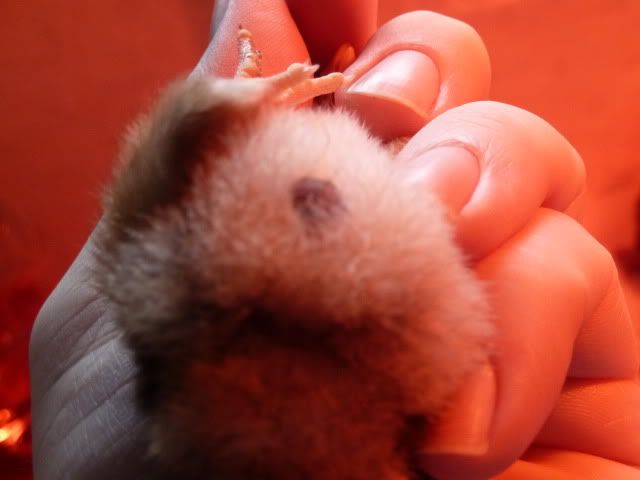
Boy is she cute!

That change in dynamic seemed to start the process all over again and this time I found myself watching their behaviors closely.

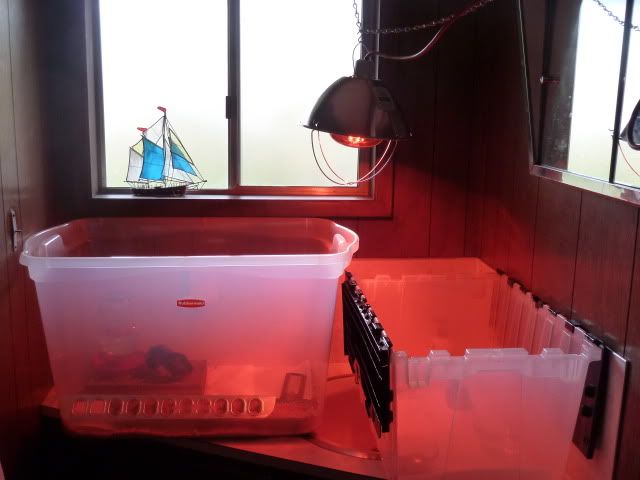
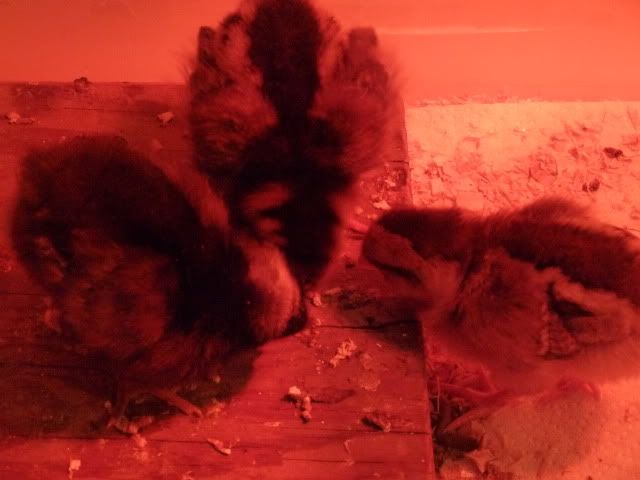
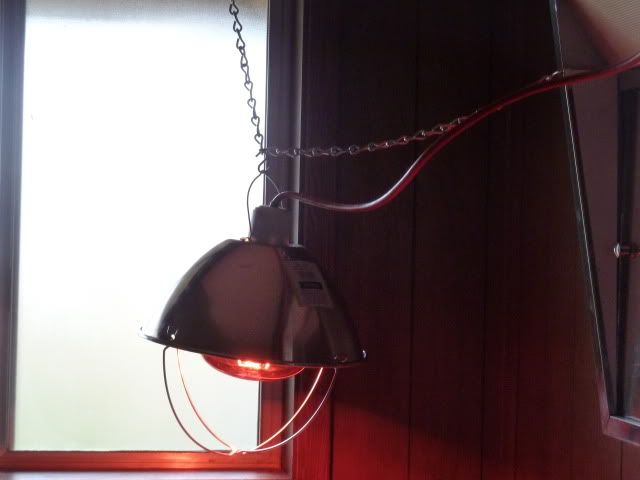
It seemed at first that she was just trying to find a spot under the heat lamp, next to a warm chick.  Of course the original three wanted nothing to do with the tiny intruder.  Then all of a sudden, one went to eat, and it quickly became "let's see who can eat the most" in the Davies brooder. 

I've never seen the chicks eat so much in a day as they ate in that five minutes. You thought we were out of food.  Boy am I glad I turned the 2x6 board such that they have more room to stand on it and peck down into the feeder.  Anyway, the older chicks kept nudging the little one out of the way, so much so that she ended up against the side of the brooder eating from the other side of the tray.
I just realized something.  The chicks are actually demonstrating my next big point in the last two pictures above.

Although at first the chicks were all pecking each other, especially the baby, this little fluff ball kept on pecking while the others were content to just ignore her.  It seems that the one I picked out was not only fast, but clearly had some serious ambition.  I mean, she's half their size! 

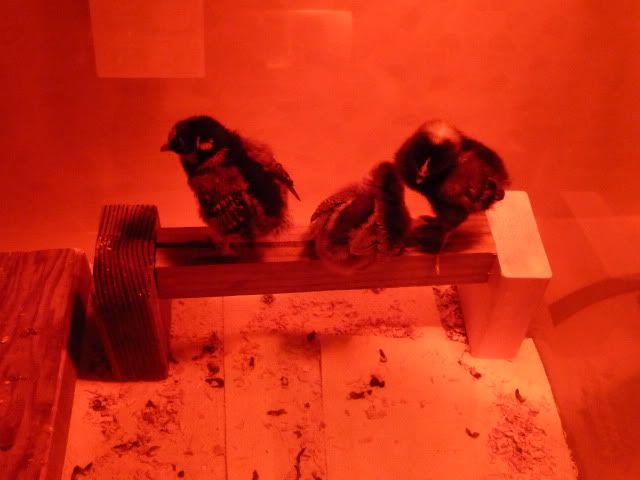
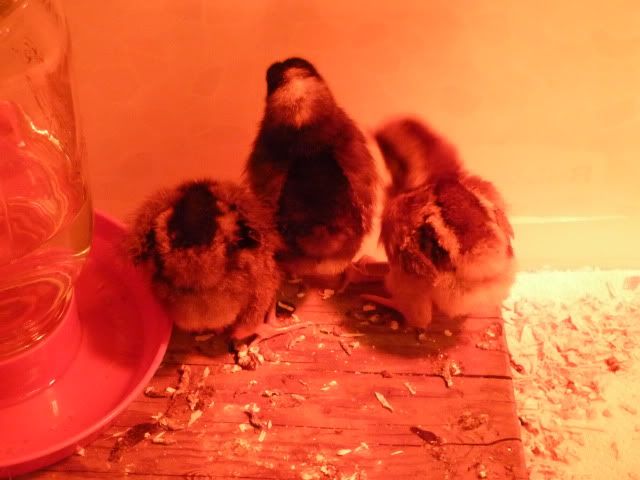
It took a bit to notice, but by ignoring the chick, I found they were actually grouping together in a set formation.

As you can see, the Welsummer is stationed in the middle, flanked by her second and third in command.  They kept that formation everywhere they went, including to the feed tray!  Any time the chick tried to get in between them (which was frequently), the closest one would peck at it.  It became clear they were protecting their leader. 

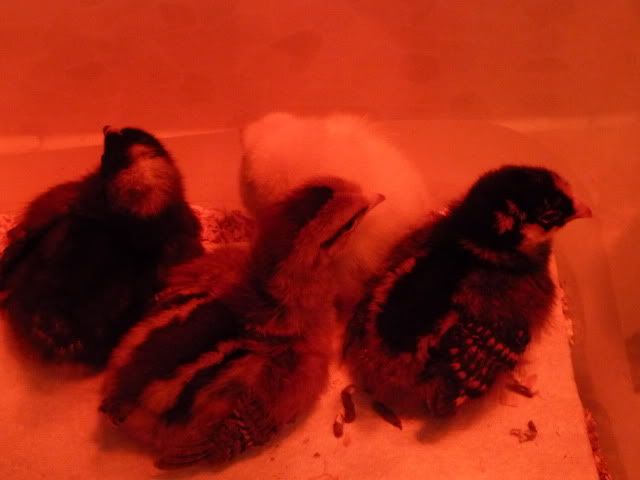
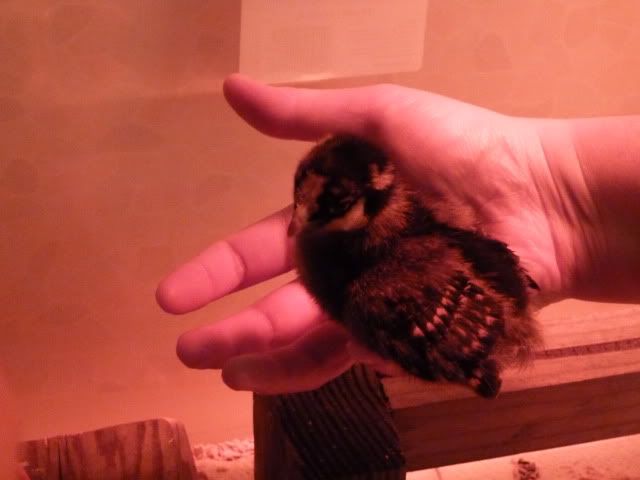
It's funny, I don't think I've seen the Barred Rock peck so much ever.  Maybe she was trying to keep the chick away from the leader, or maybe she was trying like mad to keep her place as third fiddle and not the bottom of the heap?

On it went, for hours.  This chick was clearly not settling for the bottom.  She had her sights set on number two, if not the top dog!  We left for the evening confident that these week-old chicks were not going to push around the little one.  She seemed to just wear them down.

So, now I'm not sure where she fits.  She's clearly one or two.  Whenever I think I've got it pegged, something happens to change my mind.  Like she'll race to catch up to the three of them and squeeze her way next to the Welsummer.  Then later she'll peck at the leader only to have the elder turn away in possible submission. 

Either way, this little girl has stormed onto the scene and made a name for herself (we're thinking of Buffy the Worm Slayer, hehe if we can convince the boys).  And the way she's eating she'll catch up to them in no time.
Ain't she cute?!

Tuesday, March 29, 2011

March 29, 2011 Part II

Ok folks, I hadn't planned on this post today, but my brother and sister-in-law convinced me that I had far too many pictures on my photobucket site and the last post was way too long ago. Here is a separate post on the chicks.  So much has happened since the last post, I'm shocked.  As a result, this post may be longer than normal.  And if you're only here for the garden, scroll down, there is a post earlier today about peas and child gardens.

First off, I hadn't seen the chicks eating from their tray, not once.  Sure I wasn't with them 24/7, but you'd think I'd witness it in the hour or so a day I'm with them?  All they seemed to want to do is hunt and peck on the ground.  Silly chickens, there's no food on the paper towels, only the bedding you kicked up onto it.  Oh, and a bit of grit I sprinkled down to make sure they've got some in their gullets.

A solution to this "problem" came by chance when I was helping my brother finish up his plumbing remodel of his bathroom vanity.  He has the same block of wood for the water to sit on, but he had his block turned toward the feed tray, right up to it in fact. I saw his chicks standing on the block with their heads in the holes, pecking out the food.  BINGO! My chicks love to peck.  So when I got home I turned the block like he had it. Thankfully it fit in my smaller brooder.  Almost immediately the chicks were at the edge of the block, pecking food out of the tray!

Ever since I turned  the board, half the time I see them they've got their heads buried in the tray.  So a note to chick raisers, give them a raised platform to peck down into their food.  It'll be interesting to see how fast they grow now that they're eating more. Oh, and in case you're wondering why most of my pics are fuzzy, I take them from outside the bathroom through the frosted plastic bin to make sure they don't see me and stop doing what I want the picture of.  Sorry for that and the red tint to all the pics due to the heat lamp.

Next, if you notice in the pic above, there's a 2x2 board resting on the food tray and the water dish.  This was my first attempt at a makeshift roost for the girls.  They seemed to want to sleep right there so I gave them a trial roost to get them used to it.  Well, it was a bit wiggly so it wasn't used much. Then, after seeing my brother's scrap-wood roost tonight, I decided to throw one together.  Two four-inch 2x4s and a six inch length of 2x2 later and presto!

I'm not happy with the location directly under the heat lamp, but it's the only spot I had.  Tomorrow I'm going to try to find a better configuration for everything.  But I'm hopeful they'll like it.  Speaking of tomorrow, bright and early my brother and I are heading out to wait in line for our ever-so-popular Buff Orpingtons.  We'll be 4 strong tomorrow, and for now we'll be done!

At this point, I think I'll share some of my favorite pics from the last few days. The first is my youngest watching the chicks.  He's so cute just sitting there all GQ on the edge of the sink.

Then, to be fair, here's the best of my oldest petting the normally docile Barred Rock that my wife is holding on to for dear life.

Now for a pic of a chick that wanted so badly to be out of my wife's hands, only to perch on her pinkie and not want to get off!

Isn't our Golden Laced Wyndotte a pretty bird!?

Well, I guess that's enough for today.  If I am obsessed with my chicks, can you blame me?

Enjoy your garden!

March 29, 2011

Well, Laura and others commented that I likely have chick-fever, so, when I looked at what she did last weekend, I immediately realized I was behind again on my planting. Seems I should have planted my peas but didn't.  So the night before my kids and I talked gardening and peas.  Their interest in peas came from one of those PBS snippets between cartoons.  The kids planted snap peas, then came back to pick and eat them.  They called them sugar packets.  All of a sudden, they wanted to plant peas.  So, we got some Cascadia Snap Peas and soaked them overnight.  They also wanted to plant corn, so we did the damp coffee filter in an open Zip Lock bag to germinate those.  I also took the time to plant several new succession broccoli and cauliflower. As you can see, I am big into repurposing containers for gardening.

The next day was sprinkling a bit, but we trooped outside anyway to plant our peas!  The kids got their own SWC scrap gardens to play with, though I told them what I would do.  First thing's first, weed and add compost (they loved counting the worms we found in the compost). Then we planted 5 peas in each bin in two rows with one in the middle.  Pretty generous spacing, but the plan is to interplant two corn stalks in each back corner. Hopefully the corn will grow fast enough to provide something for the peas to climb. If not, I picked up a bunch of bamboo from my folks place. I'm sure I could build some sort of trellis for them.  The front of the bins will probably be carrots as we're running out of veggies that they like.  Still, a good exercise in intensive planting!

After that, I decided to dig my beds out as Laura suggested, then add compost and plant my peas.  I didn't do it exactly like she did, but I used some of her techniques.   Here you can see the results of half my bed being dug up by rocking a pitchfork back and forth.

As you can see in the pic above, the kitty-litter bucket full of compost isn't sufficient to augment the entire bed, but it was more than sufficient to plant peas in the back of the bed.  I know the SFG spacing for peas is 8 per SF, but I just kinda scattered them around the back of the row between my two blue SWCs.  Now is when I really took a page from Laura's play book.  I grabbed a piece of scrap wood and pressed it onto the soil to make sure the peas came in good contact with the soil.


Finally, I sprinkled a bit of fresh compost on top of the row. Normally I'd water them in, but it was raining by then, so I let Mother Nature take over.

Lastly, I took my broccoli and salad greens out for a walk and accidentally left them out over night.  They seemed fine in the morning so I left them out all day and just brought them in Sunday night.  They're out again this morning and will be planted today!

See, I AM gardening in addition to playing with my chicks!  But don't worry, I will give both passions time in my blog.  Comments anyone? I love comments! Makes me feel loved, hehe.

Enjoy your garden!

Saturday, March 26, 2011

March 26, 2011

Chicken update:

Well the folks at Backyard Chickens came through for me, but not before my jumpy girl tried for hours to jump out of the isolation bin.

It seems that what I was seeing was not a disease, but an outie... that's right, all birds have some sort of belly button where the umbilical cord connected to them in the egg, but some have these bloated parts.  Apparently they fall off in a few days. The main concern is that the area is pecked and becomes infected, which can happen during the pecking order ritual.

So, when I had the Welsummer in isolation, she and the other two were very unhappy.  The two "healthy" chicks braved the brunt of the heat lamp to sit shoulder to shoulder up against the wall closest to the quarantine bin, while the Welsummer was inches away in the her bin.  The chicks were VERY vocal that day, and very unhappy.  Seems even after a short time together, they didn't like having their flock separated. 
Oh, did you notice how much shorter the make-shift bin is than the brooder box?  Well, the "sick" girl showed just how healthy she was by jumping repeatedly to try to get to her friends.  She came within a few inches of peeking over the edge! Man that girl has hops!

So, after reading all about the situation from the folks at BYC, I had to decide if I wanted to risk putting them together.  One comment suggested putting one other hen in with her for company, but that would leave my remaining chick alone.  Having three is not a good situation right now. Hehe.  So, cautiously I put her back in the brooder.

The odd thing is that after just one day alone, she seemed significantly smaller than her sisters. 
And then the pecking order ritual resumed.  This time however, she had to work extra hard to prove she was boss.  And at one point, the Barred Rock even started pecking her from behind.  I was nervous so I shooed her away.  Maybe I shouldn't have done that, but I'd hate to lose her to an infection because I put her back in the brooder too soon.

All of my concern, all seemed well this morning.  They seem happy together, though it's unclear if there's been a winner in the pecking order contest. 

One thing I've noticed in my few days as a chicken wrangler, is that they don't seem to like to eat out of their tray.  They much prefer to hunt and peck.  So I've taken to sprinkling a bit of food on the ground, which is 50% scratch. They seem to like eating that way better.

So, all is well in chickenland again!

Friday, March 25, 2011

March 25, 2011

I've read about it, skimmed over those sections of the books, but today I had to quarantine my Welsummer. 

Yesterday morning when I was changing their paper towels, I had them next to the brooder in the shoe box I brought them home in.  As I was transferring them back to the brooder, she jumped out of my hand, landed on the edge of the counter and fell about 3 feet total to the ground.  She seemed fine afterwards, but was "in bed" earlier than her sisters.  I just had to take this picture of her last night. I don't think it's a bad thing, but she was VERY cute.

In case you can't tell through the frosted plastic bin and in the red lamp light, she's got her body on the water board with her neck draped over the edge toward the heat lamp.  The black lump behind her is the Barred Rock.  The Golden Laced Wyndotte is behind the feeder as far from the heat lamp as possible.  Maybe 95 degrees isn't the right setting for them anymore?

Anyway, later that day I noticed a spot on the Welsummer's tail. I took a picture of the big brownish-red wart on her back end, just below what I believe is her vent.  Sorry you can't see it well through the feathers, I couldn't hold the bird, clear the feathers away and take the picture.  My third hand is in the shop.
So this morning she was a bit slow to get up, at least until the CATS decided to investigate while I was at the other end of the house.  Yep, I found the sickly one on the toilet seat/viewing area and my big boy cat on the counter!  They scattered when I opened the door, but shame on them!  Anyway, I decided it was officially time to quarantine her and ask for help on BackyardChickens.com.

At this point, I had to rig up something for a quarantine bin.  I had always planned on using the brooder as a quarantine area eventually, but I hadn't imagined I'd need to quarantine a chick.  So, I grabbed a currently empty storage bin from the garage (it's new so clean), threw down some paper towels and got a couple of custard cups for food and water, and set it up right next to the bin, over the sink.
It was THEN that I realized I needed a heat lamp for the quarantine space too.  At first I thought of rigging up my old dish lamp with a 100 watt bulb, but then I thought of stretching chain to make the heat lamp cover both bins.
Then, to hold it in place, I grabbed another S-clip, grabbed the very hot chain and hooked it to the medicine cabinet.  Pretty ingenious if I do say so myself.
So, for now at least, the brooder box is looking mighty lonely with just the two chicks in there.  You can tell they're missing their sister.
Of course I'll keep you informed.  In the end, I am already getting another chick next Wednesday, and could easily replace her if she doesn't make it.  I just hope she's ok.

As an update, boy are they loud being separated! They just sit as close to each other as possible looking at one another. The good news is that the temp in both bins is the same, around 95, and the Welsummer is a bit more active. Boy do I want to play with them.

Enjoy your garden!

Wednesday, March 23, 2011

March 23, 2011

Mission Control, the chickens have landed! We have three new fuzzy-butts in the house and boy are they cute, even if all they want to show me is their tails, hiding from the big featherless person.

What we have here are three of the four birds we'll be getting.  Sorry to say they're pretty camera shy so far, but they'll get used to it.  In order from above, here is the Golden Laced Wyndotte:

Look at the markings on her, she's going to be a looker.  Oh, and before you call the ASPCA on me, they wanted nothing more than to escape and plummet to their deaths, so I had to have a firm grip, though it was a cage-like one, no squeezing occurred.

Here is our Welsummer:

This little heart-breaker is definitely going to deserve to be on the Corn Flakes box (yes, the chicken on the cereal box was a Welsummer, though a rooster, not a hen).

Last but certainly not lease, is our Barred Rock:

I just love the little white spot on the top of her head.  Though when she'll develop the silver striation, I just don't know.

The final hen in our quartet will be a Buff Orpington, which doesn't arrive until next week.  However, we were told to arrive extra early as they're very popular.  I guess it's a good thing I don't have a job to keep me from getting there and waiting around.

As for my experiences from the first day of chicken ownership, I guess you can say I Mother Hen'd them a bit.  Two of them were a bit lethargic after the ride home. I guess I brought too big of a shoe box to bring them home. Thankfully they perked up after a few hours of warming under the 95 degree heat lamp.  They're definitely eating and drinking, though I've only really seen them drink. I know they're eating by the indents in the feed where they've pecked.

Mostly, they hang out under the heat lamp, or on top of the board near the water dish.  Of course there isn't much space other than those two places, but there is a cooler spot on the other end of the food tray.  As for when I show up, they are always trying to get through the plastic to the wall, away from me.  I hope that regular visits, talks and holding will make them like me enough to go where I lead.

Lastly, I've got the paper towels down to protect from sprattle-leg for a few days, but already one was showing signs of scratching for food.  It didn't work through the towels, but it didn't stop her from trying.  I was so proud of my little girl... hehe.

So, the years of wishing and months of planning have finally came to fruition. We are officially a chicken family, and one step closer to sustainability.

For now, both they and I wish you good night...

Enjoy your garden!

Tuesday, March 22, 2011

March 22, 2011

First off thanks for all the comments on my last post. I love comments. It shows folks care about what I babble on about.  While the seedlings grow upstairs with relatively little aid from me, I turned my attention to CHICKENS! Yes, they arrive tomorrow whether I'm ready or not.  And no, you haven't missed all the posts about me building my chicken coop with my brother and father-in-law, because there haven't been any. Our coops are not started, let alone done.  The good news is that we won't NEED them for a few months, but life is going to become a bit more chicken crazy until then, so taking time out to build two coops is not as easy as it sounds... hehe.  But as my brother said, everyone he's read about had grand plans to build their coop before they got chicks, but didn't, and they turned out ok. 

The main reason we haven't built coops has been the weather.  It's rained off and on every day for the last month, making it tough to work outside.  That and I tried to get my brother to work over here but he must not have liked that idea because he's never mentioned it again.  Oh, well. It'll get done, especially as the weather improves.

For now, I've got more important things to worry about. The chicks need a home.  I've been accumulating supplies over time and now believe I have everything I need for the first month or so.  Last night I set it all up for a dry run.  Since the chicks need to be kept at 95 degrees for the first week, I wanted to make sure I had the light hanging at the right height to give me 95 degrees on the floor of the brooder box.  A few adjustments and a few hours later and presto!


I liked the water dish that hooks up to a mason jar.  It's not like we don't have THOSE lying around, and they go through the dish washer well.  I had planned on getting the metal feeder that did the same thing, but after talking to the folks at the Bothell Feed Store, the small feeder wouldn't be enough for when they get bigger, so I got the 18 inch tray feeder.  It's a bit overkill for the brooder box, but for now I'm pinching pennies so it'll work for their entire lives. Oh, and did you notice the direct access to water there in the spare bathroom?  Quite handy. Hehe.  Now here's my brooder box looking down.
I sure hope this gives them enough room to for 4 to 5 weeks.  I hope my four girls don't out grow it until I have a chance to set up their teen-age box in the garage.  Also, I hope the weather heats up enough that I won't have to heat the garage other than the heat lamp. 

On the gardening front, I actually took the hoop cover off the salad bed to allow Mother Nature to water again.  I was a bit worried because it had been 3 days and no rain was expected that day.  What was I to do? I haven't de-winterized the outdoor faucets yet, so I have no water outside.  That reminded me that this spring's other project is to hook up my rain barrels.  Fun, fun times!

When I got the cover off, I noticed the lettuce was growing well, except for one plant that looks like it's been devoured by something.
Slugs maybe? Sure hope it comes back. I've got no more buttercrunch seedlings started.  I'd have to plant something else in its place.  Time will tell I guess.

Well, I hope you're interested in my chicken adventure, because I expect you'll be seeing a lot about it in the coming months.

Until then, enjoy your garden!

Sunday, March 20, 2011

March 20, 2011

First off, thanks for all the great comments folks and to all my followers.  I appreciate each and every one of you.

Deb, thanks for the offer. I may end up taking you up on that if this final batch doesn't germinate or grow well.

Before I get into my continuing tomato saga, I'd like to talk about the week that led up to Spring, 2011.  If it wasn't raining, it was windy as could be.  It seemed every day I had to go out and re-cover my salad bed.  The laundry clips I got from the Dollar Store weren't quite holding up to the power of the wind.

I especially had to take care of the two green onions that were transplanted out.  the back end of the hoop house kept blowing in, flattening them.  Happened twice before I wised up and clipped the plastic in place back there.  Sure hope they survive.  Speaking of survival, gotta get out and water them tomorrow.  Mother Nature isn't expected to help for a few days and I bet they're thirsty under there.

Now back to your regularly scheduled programing.  This week on How the Tomato Turns, I ran out of vertical space in my light system.  I knew this day was coming as the three initial plants were growing about 2 inches every three days.

It's a jungle out there doesn't even begin to cover it.  I had to do something drastic.  So, for the first time in 3 years, my light system was moved.  No, not to the other end of the house, but about 2 feet to the right, off the board.  Some careful plant movement and creative Jerry-rigging and I gave my tomatoes a few more inches.

Yep, it isn't pretty, but I've got a tray sitting on a TV tray. I don't like how far the lights are from the rest of the plants, but for now that can't be helped.  I've got a month before my tomatoes can be planted out.  I'm actually quite proud of my achievement there. Necessity is the mother of all invention.

Speaking of tomatoes, I'm kind of bummed.  I worked so hard to get my earliest producer, Bloody Butcher, to germinate.  After three attempts with two seeds each, I finally got something to grow.  Unfortunately it wasn't getting tall, but rather just sitting on the surface of the dirt. At first I thought it was just that the seed was too far down.  Then when I was moving things around, I snapped this picture and all became clear.
I'll be darned if that isn't a weed from a seed that must have overwintered in my cold compost bin.  What else could it be, it definitely isn't a tomato!?  Guess I'll be not only down a plant, but missing out of a very early producer.

Oh, and in case I wasn't aware, bigger plants need more water than little lettuce seedlings. Look what I found when I went up after three days to water and move plants around.
I wonder if this withered branch will still make a decent root when I pot it up into my SWC?

So, for now, this is my compromise of a set-up upstairs.
Gonna have to be creative about what to replace the TV tray with that's shorter and can hold up all that dirt and plant weight.

Hope you enjoyed the first day of spring in your garden.  I sure knew it was the first day as I took my first allergy pill of the season!

Tuesday, March 15, 2011

March 15, 2011

Beware the Ides of March... My wife was born tomorrow way back when, so I like to say she's perfect, born right between the luckiest and unluckiest days of the year.

Speaking of unlucky, this didn't happen today, but today's the perfect day to share it.  I was making a smoothie for the family and needed to get out the frozen fruit from the freezer.  I had checked the tomatoes on top of the fridge the night before but thought nothing of it, until this happened...


Crash! Dirt everywhere, water everywhere, and no seedlings from this THIRD attempt.  Pissed at myself, I cleaned it up, and figured I'd give up on them. So I went upstairs and counted my viable seedlings... 7, just seven. I needed 8 and wanted 10.  So back out to the garage and maybe the four time is a charm.  January 24th I planted my first tomato seeds of the season, and the last are being planted March 15th.  How crazy is that?  I definitely will over plant next year, this is ridiculous. 


If these don't go, I'll simply direct sow them and see what happens. Yeah right, in this climate? 

Today was one big thunder storm, not quite Spring, yet I hope you got to...

Enjoy your garden!

Sunday, March 13, 2011

March 13, 2011

I kind of feel like EG when he said, sorry for yet another seedling post, but what do people expect... in late winter what else is there... unless you want me to talk about my chicken research. hehe.

This post is all about tomatoes.  Let me start buy saying I've learned my lesson and next year I'll way over plant seedlings like my brother and only keep the best.  I just don't have room to keep tons of tomatoes.  More on that soon.

Last post I mentioned that I really needed to pot up my tomatoes, especially the one that was breaking off mid-stem and the two-seedling cup.  Here is the state of affairs right before I re-potted them.


As you can see, they were very ready for bigger homes.  I know some folks like to pot up tomatoes several times, but I just don't have the supply of containers to do it more than once. So those big quart sized pots is what I use.  I salvaged them from a nursery recycling bin a few years ago.  For the cut stem, it was still connected so I buried it.  Not sure if that's sufficient, but if it grows I guess it is fine, right?

For the dual seed cup, I did what EG suggested.  I soaked the soil completely and gently pulled the seedling apart from the dirt clump.  It was like stringy thread.  I tried my best to spread it out in the soil of the new pot and buried it.  Really it should have been a two person job, but I didn't bother the kids for this.  In the end, here are the three new comers to the party.  And no I didn't plan on succession planting tomatoes.


Now, in case you're wondering how my initial crop of tomatoes were doing, here is a pic of the tinkering I did to make my flat of lettuce work with my really tall tomatoes.  I'm not happy using one light fixture for the entire flat of lettuce, but it can't be helped.  Hopefully they lettuce will mature fast and I can plant it out under my hoop cover.  Maybe I'll hit it with some fish emulsion tonight when I water.


As you can see, the tomatoes are getting really big, and it's only mid-March.  I've got a month to go.  No fish emulsion for them!  If you look closely, you'll see I don't have much room for them to grow more.  Heck, here's a pic to save your eyes.


Unfortunately a few more days and I'll out stretch my current light system. However, as necessity is the mother of all invention, I think I have a solution. I can move the light system over a foot or so and set up some sort of stand for the tomatoes to rest on, then move a tray down there. If I can't go up, I can definitely go down!  That of course is a post for another day.

Enjoy your garden!

Friday, March 11, 2011

March 11, 2011

Short post today on my soil blocks and succession planting. Mostly I wanted to make it through the last of my pictures and topics from the last week so I could get to the newer stuff.  I'd like to say I saved the best for last, but I didn't.  Soil blocks aren't the sexiest thing out there, but when they work, they work amazingly.  Most of this post is about when they DON'T work. 

Having dutifully grown indoor lettuce in 4 blocks per variety over the last month due to the inability to plant out in this inclement weather, I decided to go with 8 seedlings per variety this time.  Of course by now the aged compost and vermiculite potting mix I had stored in a kitty litter bin in the garage was gone, so I made more.  My overwintered compost was great.  Worms were plentiful and everything but the egg shells were broken down nicely.  My new potting soil was made up of rain-moistened compost and a conservative dose of vermiculite, as I'm running out and don't want to buy more in our economic situation.

The soil blocks turned out great!  They compacted nicely and came free of the soil block maker easily without breaking. I was really quite pleased with myself as I hear so many people talk of complex potting soil recipes.  I just don't have access to all that material and I'm certainly not buying anything I don't have to.
As always, two seeds went into each divot and the whole tray went into the kitchen.  My wife wasn't thrilled about putting back the stand I use to keep the tray off the counter, but she didn't complain about the clumps of dirt in the kitchen... maybe... just maybe, I'm growing on her.

All was well for the first day, but as these blocks dried out, they started to fall apart.  At first I thought it may actually be a worm or two that got into the blocks that were doing the damage, but then it started happening to all of the blocks, especially when I watered them the first time.  I was so unhappy.  All that seed and work to make those blocks. Not to mention I actually had rapid germination from this year's Red Sails.

Unfortunately it was even worse by the time enough had germinated and I sent the tray upstairs to the light system.  Boy did I have to tinker with the lights and tray placement to keep optimum light distance.  Kind of a fun little puzzle.

So, how are your indoor seed starting adventures turning out this year? I'm sure many of you have flatS of them going at all times right now, but some of you may be just like me, with a small garden or just starting out, and you're wondering if starting seeds indoors is worth it.  Well, for less than $100 I built my light system will be making my own soil block seedlings forever.  And if you would just feel silly just starting a few plants, don't.  I do it all the time. All the better to park on top of the fridge to germinate.  So let's hear it. What works and what doesn't? And as always...

Enjoy your garden!

Tuesday, March 8, 2011

March 8, 2011

Let's call this the tomato post.  In case you haven't been reading, you know I have a whopping 3 tomatoes out of 10 that are going gang busters.  Another handful are languishing and three are refusing to germinate despite multiple attempts with 2 seeds each.

So, just how amazing is the growth of those big three?  Here is what they looked like the day before I decided to pot them up.
Oh, and in case you're wondering, the CD case is just there for perspective, and to raise seedling trays to allow for gravity to feed water to the plants better.  And I used to like Depeche Mode. Hehe.

Yes, I know the seedlings were past time to be potted up.  I don't know what I was thinking?  When I went to re-pot them, I realized I really don't have a good place to do that, other than my chest freezer in the garage.  Since I gave them a brief walk in the yard, I decided to do the surgery on top of my yard waste container.  Don't they look like they want to start flowering already?!

Well, my waiting so long to pot these up was immediately apparent when I tried to free them from their 9 ounce cups.  They just DIDN'T want to come out.  One plant actually started to fall apart from the potting soil, such that I was very worried that it wouldn't survive the transplant. Anyway, here's what they looked like before I threw them on a tray and brought them back upstairs for their tanning session.

My brother says he pots up his young seedlings up to the first leaves.  I bury them up to the first true branch.  Not sure which is right, but I want the dew leaves or whatever to become roots.

Aren't they magnificent looking? I sure hope the compost I planted them in isn't too fertilizer rich that they shoot up again. I can't handle more than 18 inches including the pot in my light system, and it's a long time before April 15 (our traditional last frost date).
Speaking of roots, my Legend seedling (shown on the right below) that's about ready to be potted up looks like it's been almost cut at soil level in it's cup. I would HATE to lose it since my other Legend planting is one of the never germinated 3.  I have got to pot that up tomorrow.


Another one I need to pot up is my 3 seedling cup (on the left above).  I've since noticed one of the seedlings has simply disappeared, so now it's just two healthy seedlings battling for dirt in that 9 ounce cup.  The question was still, which seedling is which.  THANKFULLY one seedling has potato leaves and the other traditional tomato leaves.  A quick search online found that Stupice tomato plants have potato leaves, so I know which one I need to survive.  The other is gravy.  Well a bit more meat and potatoes than gravy, since I don't even have enough tomatoes to fill my SWCs yet.  Here's hoping EG is right and splitting tomato seedlings is easy.  I get the process but I hate playing with fire.

Now before you post that I should really plant more seedlings next time, you''re absolutely right.  My brother has the right idea to plant 6 of each to keep the best one and give away the rest.  I have always had good luck with planting multiple seeds in each cup, but only one cup.  My results were horrible this year, so I'll make room for more next time.  Maybe I'll just start them in soil blocks and pot them up sooner. I could fit many more in soil blocks than I can with those unwieldy cups.

Well, that'll just about do it for tonight.  Thanks for all the birthday wishes. I got some money that I'll use to pay bills and maybe even fund the construction of my chicken coop!

Enjoy your garden.