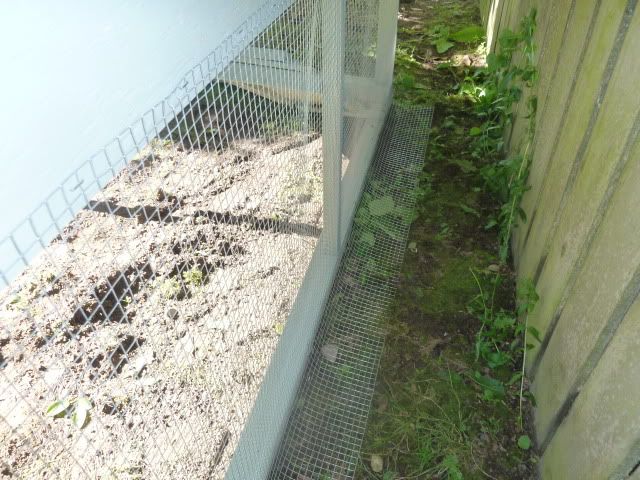
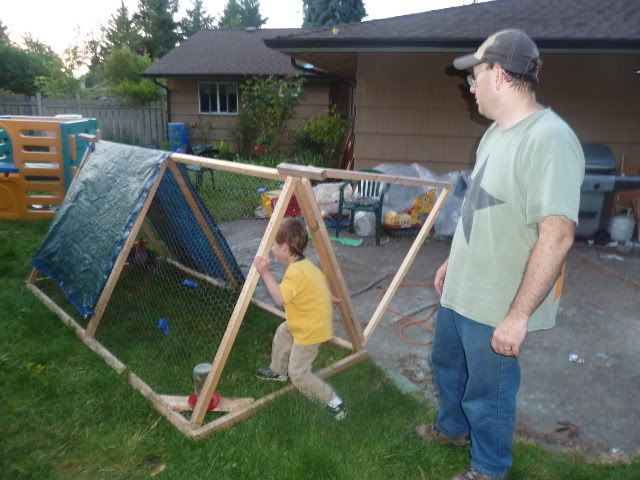
Well, the beginning of the week meant that Father's Day was over and the chicken coop progress could continue. There were several last minute details to finish up before the hens could go into their new home. The biggest of which was the hardware cloth needed to be installed on the mini-run. Three of the four sides were easy, just cut the pieces and install them. I used half-inch staples rather than my hammer-staples for ease. I sure hope it's secure enough. Thoughts?
![]()
If you notice I made sure to let the extra fan out onto the ground. In a perfect world I'd bury the cloth so it would be unnoticeable to all but the digging creature, but I'm ok with it for now.
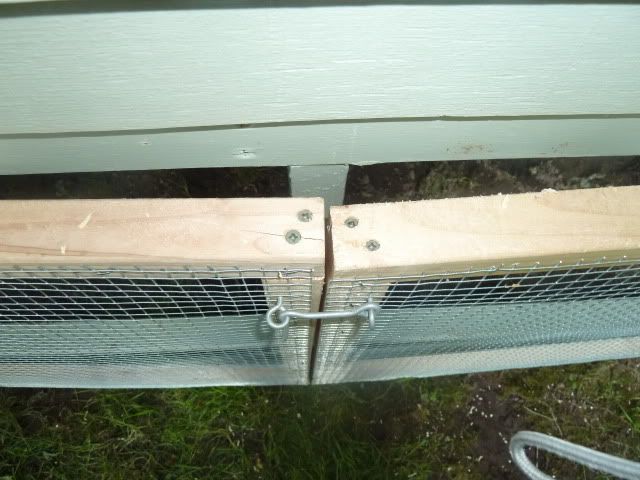
The three sides went easy enough with my brother's tin snips (boy was cutting the chicken wire with wire cutters insanely slow). However, construction was required for the front as it would be two gates to let the girls in and out daily. Constructing them out of 2x2s was fairly easy, the only issue was the fact that during the fall the middle support moved a bit. Rather than fixing the support beam back in place, I just made one door a quarter inch longer than the other. No big deal.
![]()
Taking my brother's advice, I installed the hardware cloth while the doors were on the ground. It may have been easier to install the wire, but it made installing the hinges more of a pain.
![]()
They went on pretty smoothly though I had a bit of a problem with them staying closed, even with the hook and eye attached.
![]()
It's possible that I need to increase the distance a hair on the hook. I haven't tried that, but my other thought is to go get some of those magnetic cabinet locks and install them on the doors. Not sure if they have ones rated for out-door use. For now this works, but I'm not happy with it.
That same day I took on a number of other projects, in order to get the girls into their coop.
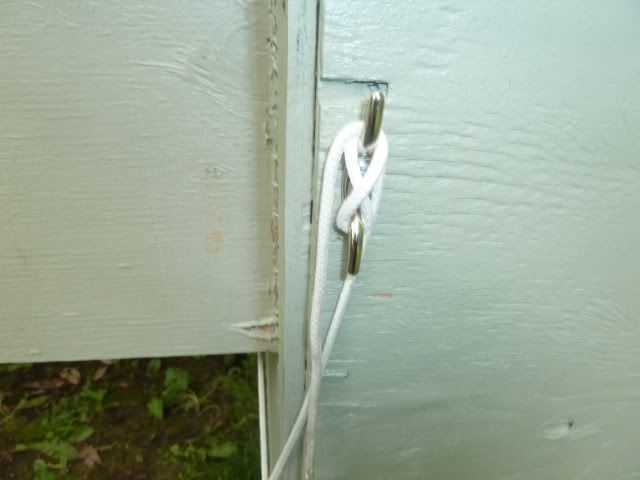
The first was simply installing the cleat to lock the rope in place when the door is closed at night.
![]()
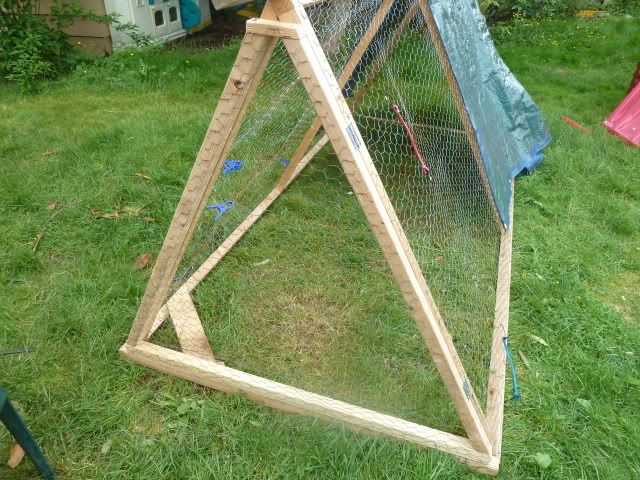
The next was not really a coop project per se, but rather one for the ark. I wanted to get the door installed once and for all. It took a while to get the sizes right and how to complete the triangle and where to put the hinges. I actually used a set of hinges planned for the run doors because the T-hinges I had purchased before I ever started building the coop don't work very well on 2x2s. They hang over the 2x2s on the run door but I put them on the door less opened and don't care.
![]()
If you can see, I ended up using a 1x2 on the top to combine them to make sure it cleared the handle. It was a last minute fix, but works well. The good news about this door is that I installed it using a paint scraper to set the clearance with the bottom board. The effect is to have a door that rubs a bit. The friction is just enough to keep the door closed if chickens push up against it, but not enough to keep me from opening it whenever I want, without an eye hook. The only problem with it is that the door opens at a 60 degree angle or so, which will never stay open on it's own.
![]()
The solution for it right now is simply to keep one of my small bungee cords to keep it open. I'm not happy with it as a long-term solution as the effect is to bend the chicken wire which is rusting at an alarming rate. On that note, I don't want to us 1/2 inch hardware wire on it. Sure, I know the chickens don't care if it's rusted, but going in and out of it and moving it around, it's common to scrape yourself on it. I know it's been a while since I've had a tetanus shot, but my kids have never had one, so it scares me. Maybe I'll bite the bullet and go with 2 inch cattle wire on it. Suggestions?
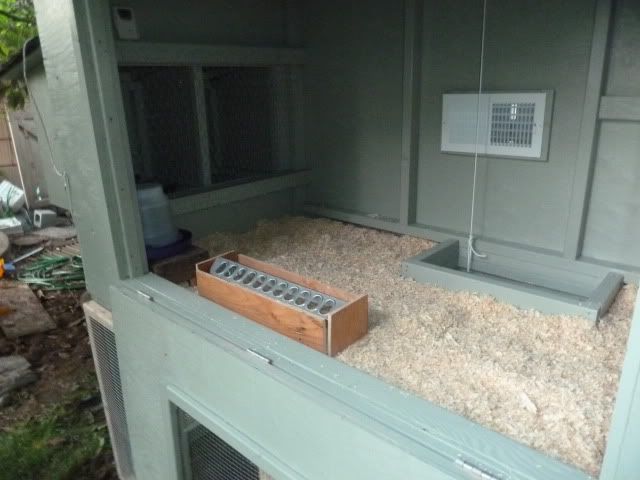
Other small projects I did to the never-ending ark project was to add a platform for the food. Mostly I wanted to be able to move the ark around without removing the food. Since I didn't have anymore 1x4 material, I went with a scrap piece of 3/8" plywood. I attached it with scrap 2x2s in the opposite corner across from the water platform. It's a bit longer than the food tray, but I decided not to cut it. I figure I can put a dish of grit or crushed egg shells later down the road. As you can see, the ark is never done. The goal is to improve it, not add weight.
As for further improvements, my brother added a roost to his ark, so I threw one in. I'm not thrilled with how badly it blocks off the back half of the ark, so it may not stay.
![]()
The girls aren't using the roost yet, but who knows.
The last project of the evening was a feeder for the coop. I had already painted a pressure-treated 2x6 but built up the walls with scrap plywood. It'll work for now as it was getting very late and I wanted to get the chickens in that evening. After that was done, it was simply a case of nearly emptying a bale of shavings into the coop.
![]()
The set-up was finally ready for the girls. I plan on putting more bedding in the coop, but not until I raise the level of the boards around the chicken door. Still figuring out the best way to do that. Some day I plan on doing the deep litter method where you don't change the bedding but once a year, letting it compost in place. This will have to do for now.
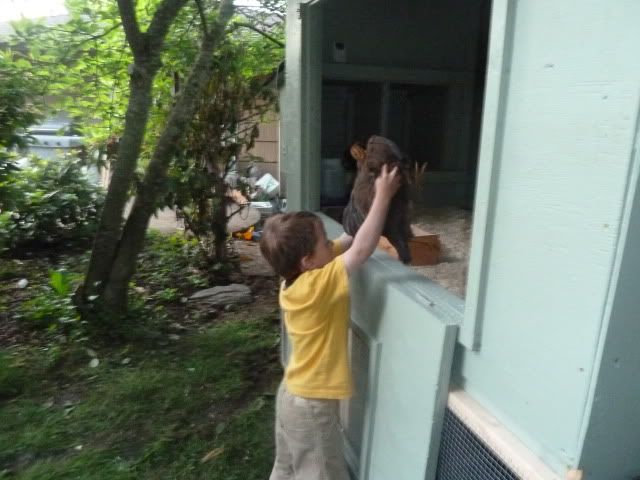
Finally, it was time time to introduce the chickens to their coop. It was far too late in the evening to put them in the run and let them figure out the ramp, so we simply put them into the coop via the clean-out door.
![]()
The only problem with this plan is that the chickens quickly learned they could jump out of the coop the same way they got in. That led to some late night chicken chasing. In the end I placed them into the coop, unceremoniously by cracking the door and dropping them in. Not the best idea I'd had. Oh well, they got in for the night.
![]()
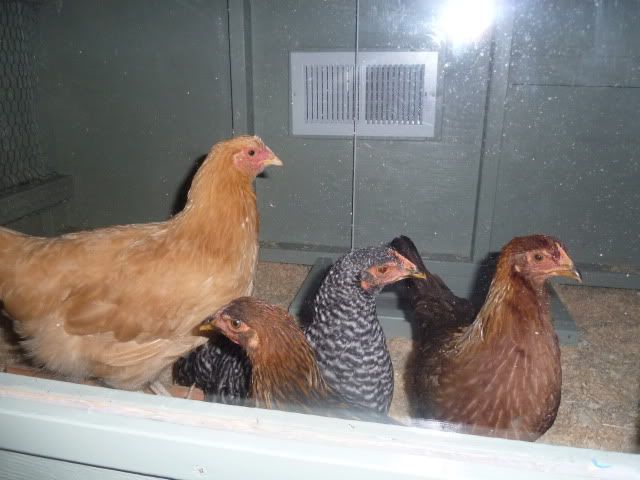
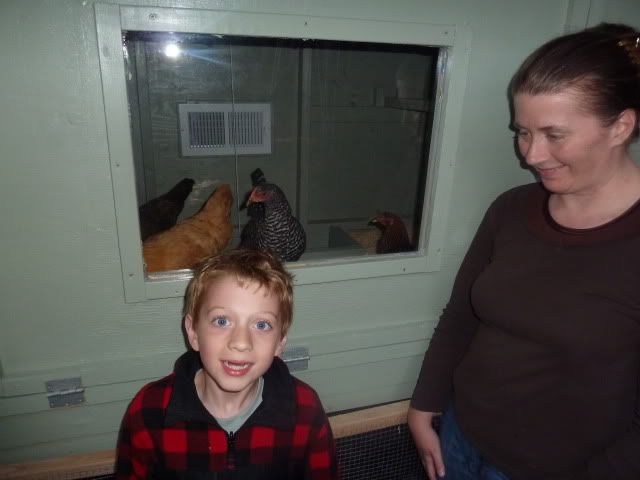
And there they stayed all night long. Doesn't everyone look happy with the chickens in their new home?
![]()
So there you have it. The chickens are now into their coop. YAY!
Enjoy!
If you notice I made sure to let the extra fan out onto the ground. In a perfect world I'd bury the cloth so it would be unnoticeable to all but the digging creature, but I'm ok with it for now.
The three sides went easy enough with my brother's tin snips (boy was cutting the chicken wire with wire cutters insanely slow). However, construction was required for the front as it would be two gates to let the girls in and out daily. Constructing them out of 2x2s was fairly easy, the only issue was the fact that during the fall the middle support moved a bit. Rather than fixing the support beam back in place, I just made one door a quarter inch longer than the other. No big deal.

Taking my brother's advice, I installed the hardware cloth while the doors were on the ground. It may have been easier to install the wire, but it made installing the hinges more of a pain.

They went on pretty smoothly though I had a bit of a problem with them staying closed, even with the hook and eye attached.
It's possible that I need to increase the distance a hair on the hook. I haven't tried that, but my other thought is to go get some of those magnetic cabinet locks and install them on the doors. Not sure if they have ones rated for out-door use. For now this works, but I'm not happy with it.
That same day I took on a number of other projects, in order to get the girls into their coop.
The first was simply installing the cleat to lock the rope in place when the door is closed at night.
The next was not really a coop project per se, but rather one for the ark. I wanted to get the door installed once and for all. It took a while to get the sizes right and how to complete the triangle and where to put the hinges. I actually used a set of hinges planned for the run doors because the T-hinges I had purchased before I ever started building the coop don't work very well on 2x2s. They hang over the 2x2s on the run door but I put them on the door less opened and don't care.
If you can see, I ended up using a 1x2 on the top to combine them to make sure it cleared the handle. It was a last minute fix, but works well. The good news about this door is that I installed it using a paint scraper to set the clearance with the bottom board. The effect is to have a door that rubs a bit. The friction is just enough to keep the door closed if chickens push up against it, but not enough to keep me from opening it whenever I want, without an eye hook. The only problem with it is that the door opens at a 60 degree angle or so, which will never stay open on it's own.
The solution for it right now is simply to keep one of my small bungee cords to keep it open. I'm not happy with it as a long-term solution as the effect is to bend the chicken wire which is rusting at an alarming rate. On that note, I don't want to us 1/2 inch hardware wire on it. Sure, I know the chickens don't care if it's rusted, but going in and out of it and moving it around, it's common to scrape yourself on it. I know it's been a while since I've had a tetanus shot, but my kids have never had one, so it scares me. Maybe I'll bite the bullet and go with 2 inch cattle wire on it. Suggestions?
Other small projects I did to the never-ending ark project was to add a platform for the food. Mostly I wanted to be able to move the ark around without removing the food. Since I didn't have anymore 1x4 material, I went with a scrap piece of 3/8" plywood. I attached it with scrap 2x2s in the opposite corner across from the water platform. It's a bit longer than the food tray, but I decided not to cut it. I figure I can put a dish of grit or crushed egg shells later down the road. As you can see, the ark is never done. The goal is to improve it, not add weight.
As for further improvements, my brother added a roost to his ark, so I threw one in. I'm not thrilled with how badly it blocks off the back half of the ark, so it may not stay.

The girls aren't using the roost yet, but who knows.
The last project of the evening was a feeder for the coop. I had already painted a pressure-treated 2x6 but built up the walls with scrap plywood. It'll work for now as it was getting very late and I wanted to get the chickens in that evening. After that was done, it was simply a case of nearly emptying a bale of shavings into the coop.
The set-up was finally ready for the girls. I plan on putting more bedding in the coop, but not until I raise the level of the boards around the chicken door. Still figuring out the best way to do that. Some day I plan on doing the deep litter method where you don't change the bedding but once a year, letting it compost in place. This will have to do for now.
Finally, it was time time to introduce the chickens to their coop. It was far too late in the evening to put them in the run and let them figure out the ramp, so we simply put them into the coop via the clean-out door.
The only problem with this plan is that the chickens quickly learned they could jump out of the coop the same way they got in. That led to some late night chicken chasing. In the end I placed them into the coop, unceremoniously by cracking the door and dropping them in. Not the best idea I'd had. Oh well, they got in for the night.
And there they stayed all night long. Doesn't everyone look happy with the chickens in their new home?
So there you have it. The chickens are now into their coop. YAY!
Enjoy!
Well done Sinfonian! That project turned out wonderfully and your girls have a great new home and a super ark to pasture them in on the lawn.
ReplyDeleteCongrats on wrapping up this project Rich! Everything looks great. Your ladies are now living in chicken luxury. :-)
ReplyDeleteThanks you two! It sure was a huge project. And my brother's thinking of building another one to sell. I think he's crazy!
ReplyDeleteAnd yes, my girls sure are doing well in thier coop. They love the the upper floor, but then love the mini-run. Just today I didn't need to persuade them to go from the run to the ark. It's like clockwork! Very happy!
Thanks for the comments. It makes me think people read this stuff.
Sinfonian, this thing looks awesome!
ReplyDeleteHere's a few things we did on ours that may help you with some of your current questions.
On our Ark we put some 1x2's over our 2x2's to sandwich the wire so you don't get snagged on the edges. That may be an option for you? Some complaints of the larger holed wire is that predators can get their arms/paws/talons through the larger openings and the chickens can also poke their heads out where they could be attacked.
Regarding the deep bedding on your coop a simple fix could be using a 1x6 (or whatever dimesion) screwed to the inside framing at your cleanout door just so you can get the bedding deeper without modifying the cleanout door. (Having this screwed in so you can take it out may help in cleaning it out too?)
The eye hook on the lower doors may work better if you replaced it with a slide bolt this will make sure they don't sag and will keep them inline and closed too.
Regarding the Ark you could make the Ark door a "hingeless" door with one latch or eye hook. I can e-mail you some information on this if you are interested.
Hopefully some of these ideas will help.
Kermit, great ideas. I like the idea of sandwiching the wire between 1x2s and the 2x2 frame. I will likely need to replace my poultry wire with something galvinized before too long, so that may be a good time to do just that. However, if I do replace it, I'd consider going larger holes despite the ability of predators to get their paws in there. They don't stay in there at night so no predators are around in the day.
ReplyDeleteAs for the bolt for the doors, that's a good idea. I have one I was going to return. I like it, maybe better than my magnet idea, even though the door would still swing open a bit once I unlatch it under your scenario.
As for the deep bedding, I'm only concerned with the chicken door frame. I like the idea of using wood to attach it like a bracket. I'll have to pick up some piece of dimensional lumber to do it. Haven't set myself totally on deep litter yet.
Lastly, the ark seems to be working fine with the door. I really like it despit having to hang it when I want to keep it open.
Thanks for the very helpful comments! I love them.
I'm not sure if you have them in your area but the only predator I'd be concerned about during the day are hawks. I never noticed any until we got the chickens. The first day we had them outside in the ark there was one on top of the Ark watching our girls. I didn't get a picture the first day but this was about a week later.
ReplyDeletehttp://www.flickr.com/photos/20378685@N00/5175389809/
We used hardware cloth too and it hasn't rusted but the chicken wire I used to keep the dogs away from one of our plants is rusting. I don't know if it's coated with something different or not.
http://www.flickr.com/photos/20378685@N00/5114654792/in/set-72157625291241572