Monday, May 30, 2011

May 30, 2011

Ah, the end of a very nice Memorial Day weekend! Tea and blogging, a perfect combination.  Saturday was spent with my eldest dressed in his Class A Cub Scout uniform and the rest of us walking around the Floral Hills cemetery in Lynnwood, placing flags on veteran's graves.  It was a great way to discuss the true meaning of the holiday.

This blog post will be about a little adventure my kids had last week. It was a beautiful Friday off from school and we had just moved the chicks out to the ark.  I was getting ready to putz around on the chicken coop when I heard a ruckus from outside.  What did I find when I went out back?  Two new chickens had joined the flock!


The boys were really very good with the chicks. Despite being a bit bouncy, they gave the chicks their space and didn't block off their food and water.  The episode didn't last long, but it did last long enough to catch this on video.


I then left them to their play in the yard.  Later making a snack, I had to snap these pics.  It's great being able to look out the kitchen window and see not only the rose garden, but the chickens playing in the yard.


What a beautiful day for the kids to play outside and the chicks to forage in the yard.  They actually do a pretty good job mowing the lawn.  If I work it right I may not have to mow the backyard much.  And both my brother and I have found that two days after the ark has been in a place, you can't find any trace of their droppings. They get absorbed into the ground very nicely! I love it.

I hope you enjoyed your holiday weekend and got a chance to think on the significance of the holiday.

Enjoy!

May 29, 2011

As it has been a while since I've posted about the coop construction project, I suppose it is time to catch you up a bit.  A ton has happened over the last few weeks as my brother finished his coop and has lent his new found knowledge to my nearly identical project.  I've found I am very productive when I have someone there watching over me, so between the two of us, a ton has gotten done.  Normally it is he who says let's tackle this and then tells me what to do.  I've always said, if you tell me where to swing a hammer, I can do it.  I've proven it on the roof and now I had a chance to prove it with the rest of the coop.

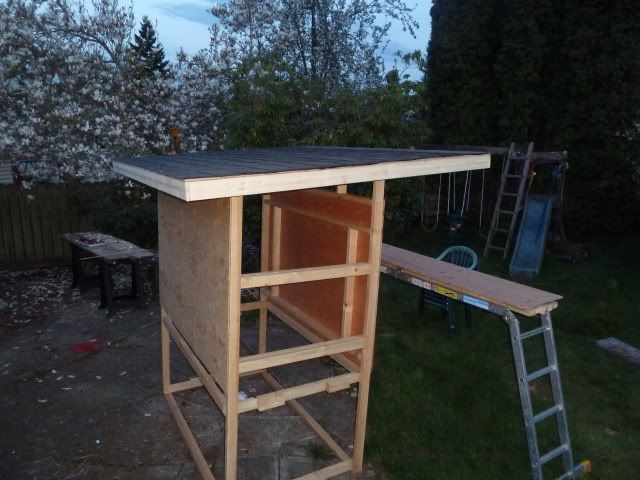
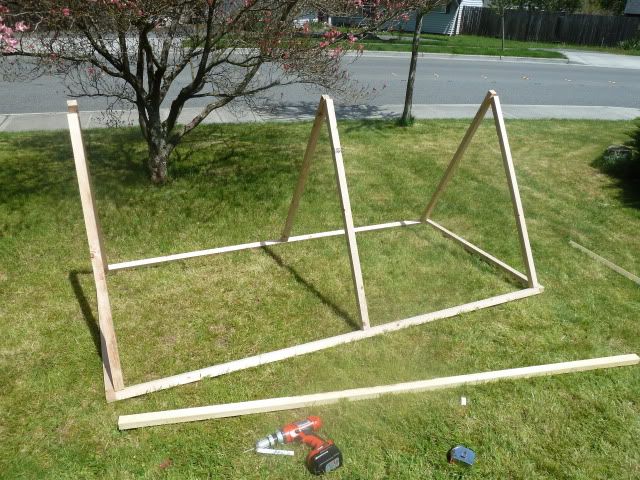
When last we've left you, the coop was looking like this at twilight...


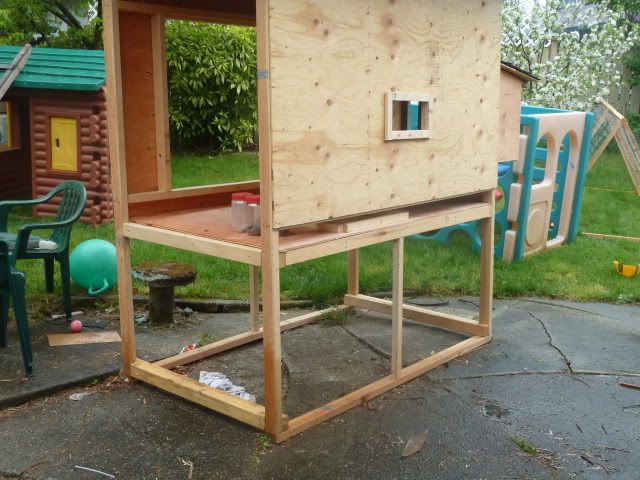
First off, in my brother's absence, I did actually tackle a few of the small items myself, based on conversations with my brother on what to do first.  For instance, I purchased the lower louvre vent that can open or close as necessary for proper air circulation.  I placed it about 18 inches off the floor to keep it over the hens' heads but still providing the some air flow.  Mostly it was all about wrangling a very heavy skill saw to do vertical plunge cuts after drawing it out based on the inside dimensions of the vent.  After that it was measuring and cutting 1x2s for each side to attach the vent to.


Oh, and I guess we also threw up siding on the nesting box side and cut the whole for the nesting box frame.  And all right, you got me, you can just see the whole we cut for the clean-out door in the front of the coop.  That was actually a more drawn out project as we decided man handling that heavy skill saw for such a precise cut was not a good idea.  So we took the front siding down and cut it out horizontally.  Aside from having to pull dozens of 2 inch staples, it worked well, it just took a while.  You can tell we were cranking and I forgot to take some pictures.


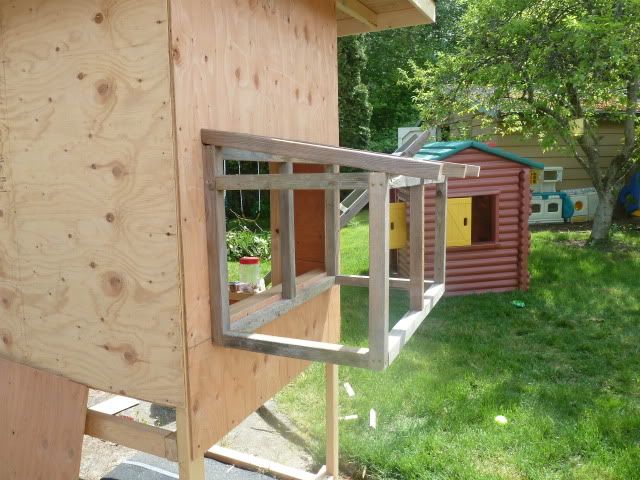
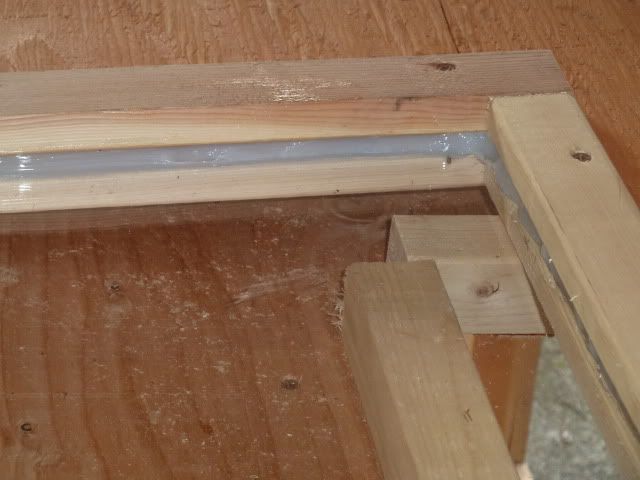
Here's me installing the 1x2 stops on the three sides of the door so the door has a place to rest and doesn't let air in when it's closed.  Next up was simply attaching the nesting box frame to the siding.  My brother's grip clamps came in handy a ton on this project. So much so that I bought some today.  He calls them his little friends (Scarface reference for all you youngin's).


It was about then that my brother had to leave me for the day.  But since we've been having nice weather and of course it's staying light later, I kept working.  He suggested that I side the nesting box. Oh, and I needed to add a few more pieces of wood to the frame too.  Namely a middle 2x2 on the bottom to attach the separator board, and a 1x2 to attach the bottom siding in the back and the hinges for the doors on the top of the back.  It actually went faster than I expected since he left his tools, including a battery powered 6 inch skill saw which was much lighter and more accurate than my ancient one.


Hehe, here you can see my fatigue setting in.  On the left side the siding drops a half inch from the top of the rafter because I couldn't read my writing.  I thought it said 19 and a quarter inches, but it was actually 3/4".  Oops. No biggie of course since the rafter is solid there.  Can't say the same for the separator board as it I didn't want to notch it to fit around the 2x2s.  It just has to provide some basic cave-like privacy, which it will do nicely.  You can see the shadows moving on into evening as I finished up the siding project with the roof.


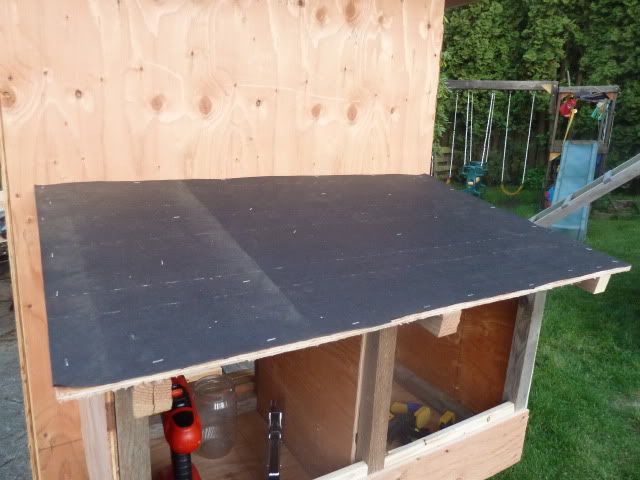
At this point I should toot my own horn for forethought.  I cut the roof a few inches wider than the siding to keep rain from running down the walls. I also made the roof 36 inches wide so that a 38 inch roofing tile would hang over just enough to curl over over time.  Smart huh?

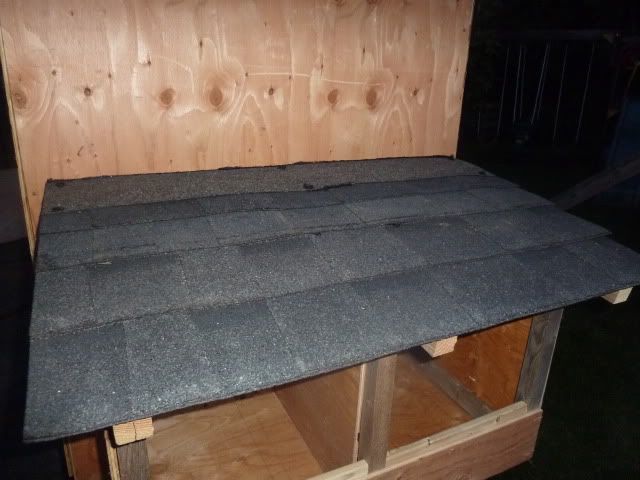
Then I considered the weather for the next day.  It was supposed to rain.  I thought of the way the 3/8" plywood warped early on, requiring replacement, so I couldn't stop here.  I remembered my father-in-law saying if you have tar paper down it is decent rain protection.  Oops, I was out of staples to attach it.  A quick call to my dad and a dash across town to get more staples from him and it was time to cut the felt paper.  Thankfully I had just enough paper to fit the nesting box roof.


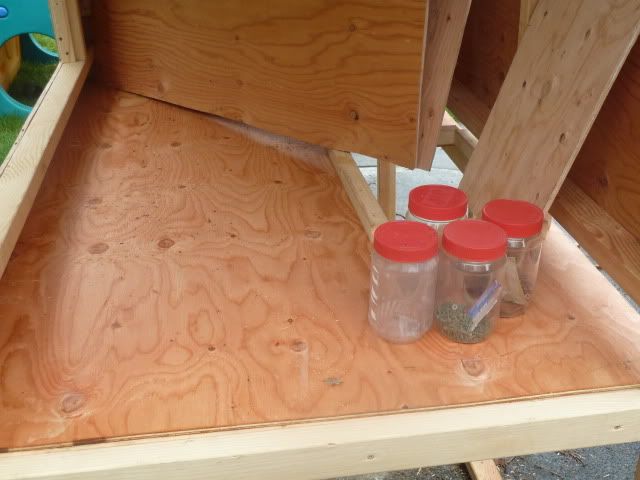
Don't the nesting boxes make great places to store tools?  I'm not sure I'll let the girls use them, they're so handy!  Anyway, by now I was on a roll.  Why couldn't I finish the project that night?  Mosquitoes be damned! The race was on. 

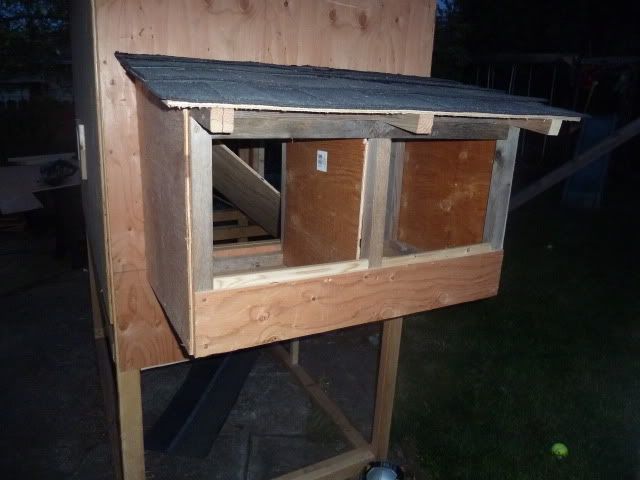
I didn't care if the pattern of the tiles matched or was offset like it was supposed to. I just wanted to get it covered fast.   The first two tiles worked perfectly, but then I started getting sloppy.  I knew I needed to cut the last tile to fit against the wall, so I cut it before measuring.  Bad idea.  It was short.  So I just used the part I cut and made it work.  It is a chicken coop after all. The chickens won't care!


Didn't I do a great job!?


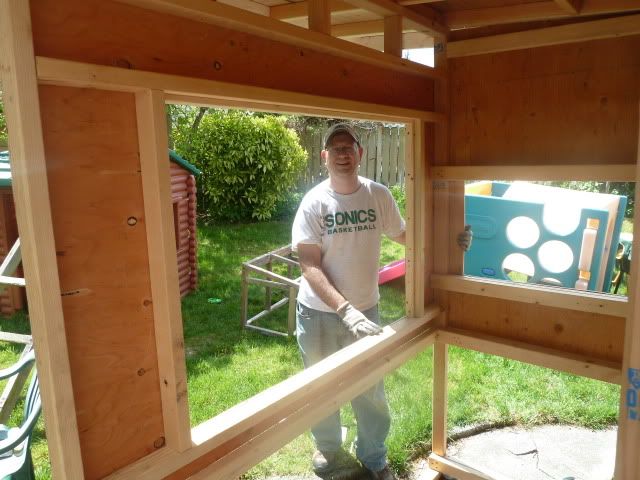
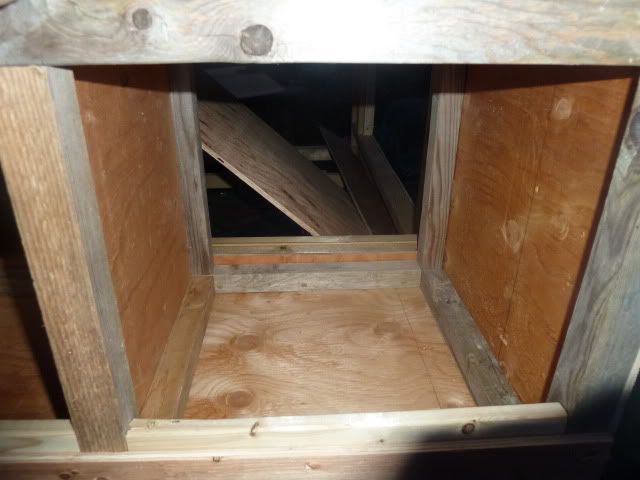
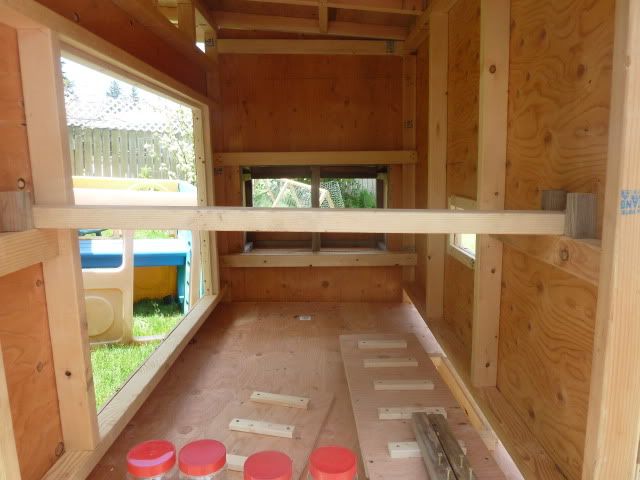
Now all it needs is a paint job and the access doors.  They're still waiting on those things as the hinges we bought way back when are not right.  Here's a shot from inside the way the chickens will see it.


Boy did I sleep well that night. But the next day came bright and early.  We didn't get quite as much done that day as the weather turned foul mid way through, but we did get the floor cut and the chicken door cut and framed out.  You can see how tired we both were as the reveal 2x2s didn't line up well at all to form a perfect frame.  Oh well. 

We also added a bunch more floor joists to both support the floor and to build the chicken door.  No, the chickens aren't heavy and no human will be walking on it, but the last thing we wanted was for the floor to warp.  I could stop there, but I don't want to bore you with too many more chicken coop construction posts, so I'll continue through the work days.


You can see though, that with the roof in place, everything inside is nice and dry.  The next day I rested.  All I did was secure the floor once we knew the chicken door was right and we wouldn't need much more access to the inside of the coop. 


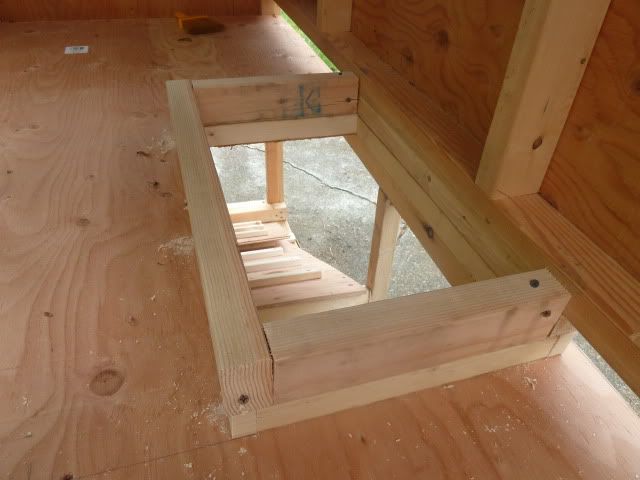
The next work day we tackled the permanent ladder and the door part of the ladder.


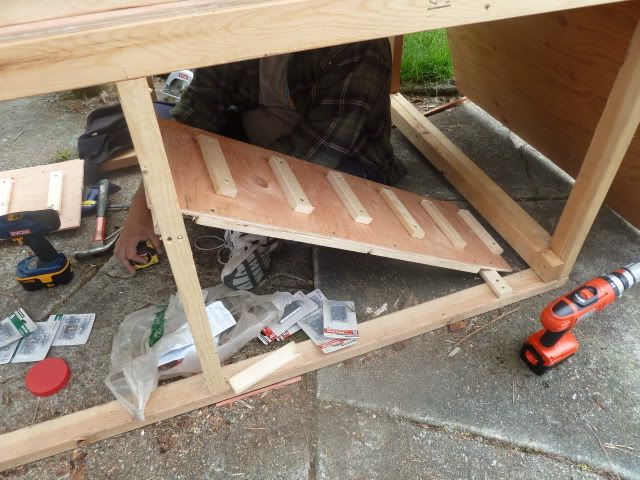
We cut the ladder 12 inches wide and spaced 1x2s every 5 inches to better accommodate the chicks now as well as the hens later. Oh, and those raggedy pieces of 2x2 are the handles I cut for the ark.  While I was alone I built the roost.  I decided on a single roost 24 inches above the floor, hoping they like to crowd together rather than sleep apart.  Who knows?  They don't use the mini-roost in the brooder much.


The next day we installed the permanent ramp.


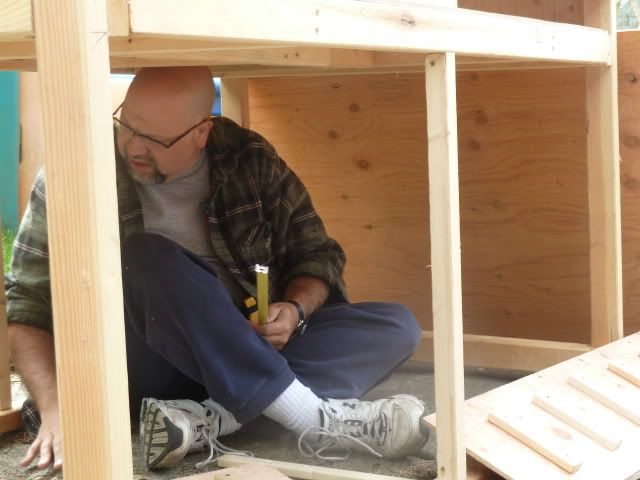
I had to put this shot in because my brother was adamant that this was my blog so he wasn't to be in any of the shots. BS!  If it weren't for my older brother, none of this would have been possible, in more ways than one (he was my inspiration for getting chickens in the first place).  Here he is bonking his head on the floor joists in the mini-run.  Speaking of which, this coop was clearly built for me. He's a few inches taller than me and has hit his head on doors and floors constantly. Hehe. 


I love the gentle slope to the ramp.  One of the many things my brother would have done differently on his had he known better.  On mine he could. 

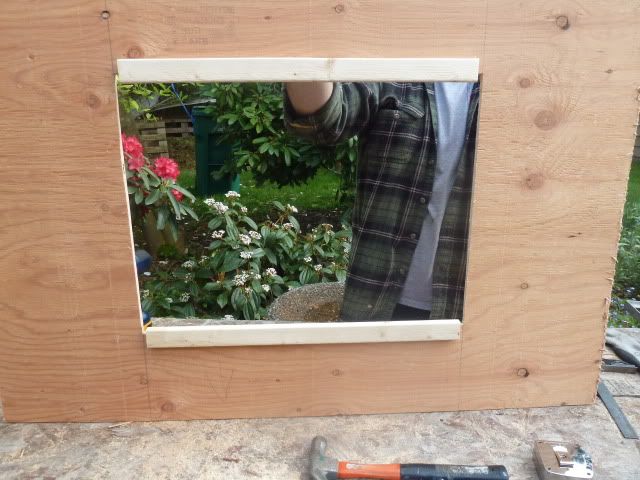
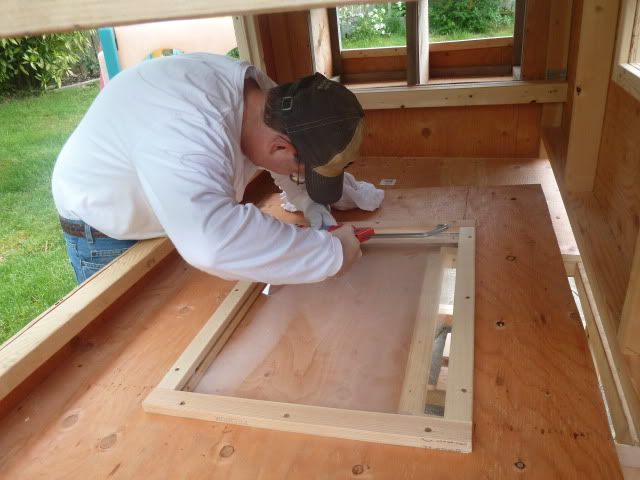
The next time we met it was time to install the Plexiglas window in the clean-out door.  I took over most of the measuring and cutting as it was determined that my younger, steadier hands cut straighter. MUAHAHAHA, take that big bro! hehe.


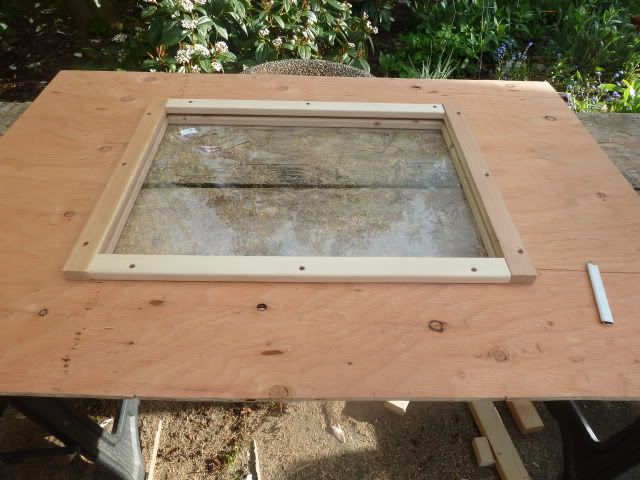
I must say the window fit perfectly, with a 1/4" gap for wiggle room, by design.  Then we cut and installed 1x2s with a 1/2" reveal to hold the window in place.


I must say the trim was pretty heady stuff.  We made on or two mistakes but ended up being able to use the scrap pieces of 1x2 elsewhere so it was no big deal.  Here is a shot of the window in place.  Didn't we do a bang up job?


Note that the side pieces look darker because I ran out of 1x2s and needed to use some scraps from my brother's project.  He had spruce rather than pine.  It's the inside and will be painted, so who cares.

Not much happened over the next few days as my brother was tired and busy with other projects over the Memorial Day weekend.  I did get a chance to caulk in the window to keep it from moving and to weather proof it.  At first I used a small tube of clear fixture silicone caulking, but found it didn't create a big enough bead and I clearly didn't have enough, so a quick trip to my neighborhood True Value and presto, I had a whole caulking tube full. It made quick work of it.


I think it turned out pretty nice, despite the hiccups along the way.


The last thing I've done to-date is this morning I built up a wall around the chicken door to keep as much bedding as possible off the door and out of the mini-run.  If my brother's coop is any indication however, it's a lost cause.  Anyway, I started by filling in those gaps that you see above.  Not because I'm shooting for perfection, but I found one area where there was a small hole in the floor as a result of the reveal boards being too short.  The simple fix was to cut a series of 1 inch pieces of 2x2 and attach them to the boards to extend them.  Simple.  Then I built it up with scrap 2x3 on edge.  It was here when I ran into problems. We'd long since ran out of 2.5 inch screws and 2 inch screws just wouldn't cut it for a 2x3 on edge.  That's when I ran to True Value again and got more screws, along with my own little friends (grip clamps) on the way to a BBQ at my brother's house.  Finishing up will have to wait until tomorrow as the sun went down before we got back.


The saga continues, but that's plenty for today's post and all I've gotten done to-date.  Please comment and tell me what you think.  What would you have done differently?

Enjoy!

Saturday, May 28, 2011

May 28, 2011

First off, a bit thank you to everyone who's followed this new blog site! We just hit 50 folks.  Thanks and I hope you enjoy it.

Many of you I've returned the favor and have found several new blogs to read on a regular basis.  I try my best to comment when the post strikes my fancy.  However, I'm very frustrated at the moment.  For some reason I can no longer comment on folks posts.  It now says I have to choose a profile.  When I choose google, it asks me to log in (I should be already logged in).  So I log in again, and it takes me back to my post.  However, now it says "anonymous says" and then I type the word and it takes me back to logging into google.  That process continues in a loop.

Needless to say, I have tons of comments I would like to make but have been unable to do so.  Sorry folks.  Anyone have any thoughts on how to fix this?

I guess for a blog post tonight, I'll talk compost!  I haven't done that in a while. 

Spring is the revival of my compost pile.  This year, like so many others I'm doing a single pile while I use last year's compost from the other bin.  It's not the way I would like to do it, but I just don't have the space for a three bin system.

Anyway, with spring comes the time to start mowing the lawn again.  I've got a 1/4 acre of mostly grass, so when I mow, I have over a cubic yard of clippings.  I was excited to be able to mix in my used bedding and droppings.  A very new experience for me and one I've been looking forward to since I read how good chickens are for the garden!


Yep, one change of the potato bin brooder box creates about 10 gallons of bedding.  At least it fills two 5 gallon buckets, hehe.  I decided to use one bucket per yard. 


After dumping the greens on top of the partially composted material, I added the kitchen compost, spread out the used bedding and wet it down.


Then, as my yard is so much work to mow, the next day I mowed the back and put it down on top, followed by the second bucket of bedding.  I ended it up with the final bit of clippings. 


So, in the end, one mowing created a compost pile that's 5x5x3'.  My brother on the other hand, ripped out his front yard grass years ago and has to ask his neighbors for their clippings.  Anyway, I need more browns in this bin.  It was a bit stinky for the next several days as the nitrogen burned off into the air.  Next time I guess I'll have to lay down more newspaper and mow it into the clippings.  It's a good way to mix in browns.  Odd looking but effective.  Funny how I have access to countless sources of greens but very few browns in early spring.  Sure there's the bedding, as well as leaves and twigs I mow up, but other than paper, what is there in abundance?  And to think with this weather (rain one day, followed by a few days of partial sun) I'll have to mow again this week!  It'll mean great compost next year.

Lastly, I was reading a back copy of my brother's Mother Earth News magazine, and there was an article about wood chips and sawdust as mulch in the garden.  Apparently wood shavings with a bit of nitrogen material makes a great mulch and even though it breaks down slowly, over a few years it increases the amount of organic material in the soil more than any other mulch.  It also makes an incredible mulch for blueberries and strawberries.  Bingo! I just happen to have a blueberry/strawberry bed! I can't wait to try out using bedding as mulch to control weeds. I may just sacrifice using bedding in my compost if it means not having to weed that bed as often. It also increases the acidity in the soil, which blueberries love.  Very cool.  Hehe, I need more bedding, or another source of browns!

Enjoy your garden!

Thursday, May 26, 2011

Special Tomato Post

Help, what's killing my tomatoes (now)!?


My guess is it's too much water on the leaves, as in we've had far too wet a spring than normal.  Here's another shot.


It's not happening to all the plants, but a few of them.  Other than that, none are growing despite multiple shots of fish emulsion.  Very annoying.  Makes me really want a greenhouse as my brother's store bought specimens are perfect because they were started in greenhouse conditions.  Unfortunately the only place to put one is against the house in the front yard, well side yard.  I am strongly leaning toward removing the grass and putting a half dozen 4x8 beds and a greenhouse.  What's stopping me are two little boys that could use that roughly 30x40 space for all sorts of things growing up.

Anyway, my immediate dilemma is this problem with my tomatoes.  Any ideas?

Lastly, I was talking to my brother during out coop building ordeal and I finally learned the difference between OP and Heirloom.  Apparently all my heirloom tomatoes were orange last year because of cross pollination.  Thank goodness I didn't save seed, because it would have bred orange going forward.  As for heirloom, Gills All-Purpose can't be considered heirloom because it's not like 75 years old or something, it's only 25 years old.  Gotta love rules like that.  Very interesting.

Thanks for the comments!

Enjoy your garden!

May 26, 2011

Man, I just checked my phone pictures and came up with yet another post... Boy they're piling up.  I don't like to do more than one a day as many of my readers only check blogs once a day.   So check back daily for the next few days as there will be many to read... and comment on if you're so inclined!

As promised, this post will be all about the chick's adventures outside.  I confess that being behind in my blogging made yesterday's post seem a bit out of place... the girls have actually been outside most of the day every day for the last 5 days.  And to say they love it is an understatement. 

I have a timer on their light (a CFL now that their feathers are in) to effectively mirror daylight, 6 AM to 9 PM, but I don't take them out of their brooder until around 10 AM when my youngest is up and dressed to help.  I start by moving the water and food outside.  I still need to head to the feed store for bigger containers.  Then it's time to move the chickens!  Dot and Twinkydink are really good and just about walk into your palm.  Summer and Buffy on the other hand, run away, though Summer only half-heartedly so.


Right now it's a very labor intensive process as I either need more than one person transporting them, or have both hands free to have one in each arm.


On this day however, I had more help than I could ever hope for...


Isn't he cute? Well, finally, we make it to the ark. I love how light it is so I can easily slide it around the yard to a new place every day.  I actually move it before I take Summer and Buffy out for the evening, as I have to crawl in after them. I move it so I don't kneel in droppings.  Which I am letting compost in place.


Did I mention the kids love to help with this part?!


They have been outside, rain or shine for most of the daylight hours of the day, which is my intention since my mini-run is only 18 SF and has no predator protection. However, I was talking to my brother the other day, and we agreed, that in a pinch, the coop could count as space to keep them content, so that's 38 SF, just shy of the 40 recommended for full-time space for 4 chickens.  That would allow us to keep them completely under cover on really bad Northwest days.  Though for the most part this is where they will hang out during the day. Of course before it gets to be fall, I'll need some sort of cover, which I am currently planning on 1/3 plywood to accommodate a nesting box in the peak.  The way I figure it, with a handle on top I will be able to lift and lean and move it fine standing behind the covered part.  For the remaining 2/3 of the ark, on really bad days I can throw a tarp over it.  It would be great to get a clear 5x8 tarp with grommets to bungee cord in place as necessary.

So, there you have it, for the time being the ark is done. I find it difficult at best to work on the ark with the girls in it, so I may need to wait until the coop is done to make any more additions, other than a handle to move it.  So enjoy the last video (Photobucket and Blogger weren't talking to each other well, so I had to upload them directly from my computer. Hope they turn out ok, and enjoy!

Wednesday, May 25, 2011

May 25, 2011

Man, this chicken coop project is going nowhere fast and the chickens were getting more and more anxious. Maybe it was the sun breaks they could sort of see when I left the garage door open for ventilation, or maybe it was just that they were too big and getting on each others nerves.  Women never do that though, do they?

So, with the prospects of moving them outside anytime soon fading like our sunny days in spring, I decided to do something about it.  I may not be able to get very far on my chicken coop solo, but I could throw together some 2x2s into a chicken tractor (though I like the term ark better, and not because it's what they say in Europe).

It all started one day that I was frustrated by the slow progress on the coop, but didn't know how to proceed.  The sun was shining-ish so I grabbed my screw gun, set up my chop saw and took a 2x2 off the pile.


I'm not sure whether or not I'm a visual learner, an auditory one, or one of those new-fangled kinetic ones, but I do like to lay out my projects, if only to see if I've got enough parts to build it.  You may also notice I'm in the front yard, not the back.  My youngest had noticed the sunny weather and began clamoring to ride his bike in the cul-du-sac across the street.  This was my solution.  He rides where I can see him, I get my work done.  It had worked well when I mowed the front the day before.


Oh, and the chair is because I had just mowed the (foot tall) lawn, shame on me.  Took forever and I was exhausted and sore the next day.  Funny, I never really figured out how to sit in it and do the project. I did sit (read collapse) on the ground a few times.  I was in my work jeans, so no biggie.

The cuts on this project (so far) were very simple. Take two 8 foot 2x2s and lay them out, then start cutting a mess of them in half. Two 4 footers for the bottom sides, and six for uprights as this is going to be a triangular ark.  Then came the task of putting two screws into the end of 2x2s without splitting them.  Good luck with that even if you pre-drill.


Ain't it purdy?! Sure the 2x2s are just leaning together, but you can definitely see the shape now.  Very quickly this project was coming together.

Putting the top 2x2 on was a challenge.  First off, nobody had a 10 foot 2x2 that wasn't pre-primed and bowed something fierce. So, I had to just make due with what they had.  Next, the first side was going to be easy to attach to the top, but the other side would need to be cut at an angle. The problem was, which angle? I got lucky with my nesting box rafters with 15 degrees or whatever, but I didn't for a second thing I could simply divine the proper angle for a given situation.  That and it's been way too long since High School calculus class (I regret opting out of college calculus using my AP credits).  In other words, I can't for the life of me remember how to figure out the proper angle.  Anyway, long story short, I got lucky again. It fit the first time, so I cut the other two and put it together.  My wife had to help with the final assembly, it wasn't a one-person job.


Unlike my brother, who made a 3 foot high ark in the same style (can you tell we researched things and discussed them to death, coming up with the "best" practice?), I went with a 4 foot high (close enough) so I could crawl in to retrieve my stubborn girls.  I hadn't thought it through clearly though, because after I flattened out my chicken wire, I realized that it was exactly 4 foot wide.  Thankfully it stretches, more like bends, if necessary to attach to the frame.  Besides, if I leave a one-inch gap at the top, it's not like they can fly through it. 


For the "back" side, I simply cut a 4 foot square, attached it and cut off the ends.  By the end, I would be regretting not borrowing my brother's tin snips. Using wire cutters for this project was a tiring process.   The other side however, needs to be able to open to let the chickens in, and for me to crawl in after them.  I have great plans for this ark, but for now, I just need to let the chicks have some outside time.  I settled on a very temporary solution... bungee cords!


It may not be pretty, but it's functional. Have you heard that before from me? Yep, that's me, functional but not pretty. Hehe. All I have to do is remove two of the bungee cords and presto, the "door" opens. Tada!

Moving it is very easy as it's currently light as a feather.  It will get heavier once the front door is on, and the paneling is up on one side to provide rain protection and a place for a second floor nesting box.  Although it's very light, it is a bit awkward, so getting it into the backyard (through the gate) required my wife again.  At least turning it upside down made it so we didn't need to lift it over our heads.  Whatever works! 

Next up, getting the chicks outside...

Enjoy, I'm sure the chickens will!

Tuesday, May 24, 2011

May 24, 2011

Wow! What do you get when you add lots of rain, a little sunshine and three square feet of compost around an apple tree that produced exactly one apple last year?


Ahem, please ignore the buttercups in the background, they've gone wild and it appears the chicks don't care for them, so I need to just yank them out.

Back to the apple tree. This year, for whatever reason, the tree has just exploded with blooms!


I am so impressed that I really want to figure out what, if anything, we did to make this happen. I want to do it again next year.  Of course, what's needed are bees for pollination, but thankfully, since I've been out with the chickens, or working on the coop, I've happily seen dozens of bees (both HONEY and bumble) playing amongst the flowers. Yay! Now if only they made it to the blueberries and will stick around until the plum tree blooms.

The only time in the four year history of this tree that we have gotten anywhere close to this level of production was the second year.  That year I thinned out all but one apple per cluster. I will likely do that again, and maybe limit it to 15 to 20 apples total. Thoughts?

Oh, and just to let you know, this should be one of many posts in the near future as I work through my uploaded pictures.  Lots of action going on at the Davies homestead! Exciting times!

Enjoy your garden!

Saturday, May 21, 2011

May 21, 2011


Boy, I've been so busy lately I can't imagine having time to work.  I guess it's been more that we haven't had nice days like this in a very long time.  In fact, I heard we hadn't had a temperature over 70 since November 3, 2010. No wonder even my cool weather crops are languishing.  So here is another chicken post. They unfortunately are growing like weeds!  Take a look.

I think I should give my alpha her due, so here's Summer, staying still for her close-up.


 And now to show off her gorgeous coloring, here is her lovely feathering...


Even though she's closer to the bottom of the pecking order, Twinkydink definitely daddy's girl. She'll come right up to me and let me grab her under the breast, no problem, and will sit in my arms for about as long as I want her to.  She's also my favorite for her coloring.


 My next most docile would be Dot, my Wyndotte.  She may very well grow into my favorite coloring if she gets that rare green sheen to her like some of her breed get.  For now she's still up their with her golden flecks in those dark feathers.  Pretty huh?


 Last and certainly least, Buffy the Butthead, and no I don't use that name around the kids, but boy is she annoying.  Not only does she hate me and run away from me every chance she gets, but she's taken to picking on the rest of her sisters.  What a bully!  Pretty though.


Don't think she looks ornery in that picture, take a look at these! My wife kept trying to get a good shot of her but she kept on squirming. 


I finally had to hold her tight to keep her from flying away or clawing me.  She's actually showing some signs of being a he, and if that's the case, I won't feel bad at all about getting rid of him.  S(he)'s a jerk!


Well, that's it for our individual shots, now here's a group photo of the girls cleaning up their mess they spilled  while I refill their food tray. They definitely pick through it to get the tasty seeds and leave the powdery mash alone.  I've taken to just topping it off rather thank dumping it.  Saves money that way.


To end, I will share another video that was taken a week ago.  Shame on me not posting this sooner.  Sorry folks. I will try to be more vigilant.


Enjoy!