I know I really should have a garden post or two to throw in, though with the weather we've been having (coldest, wettest spring on record), not even the cool-weather crops are growing, and my brassicas are getting demolished by slugs. It's so bad I refuse to plant out my next batch until the weather improves. I won't have the slugs get to these babies. They may be all I get.
So anyway, not that you need one, but today's yet another chicken coop post. I mean, if you think about it, the chickens are getting so big and ready to go out, that I pretty much HAVE to finish this coop. If you've been over to my brother's blog, you'll see he's almost done. So, I've pretty much let my yard go to the weeds and every dry day (we've had 4 in the last 3 months) I've worked on my coop. The last such day was devoted to the nesting boxes, and thus this post was born.
The more I've watched my brother's coop go up, the more I've learned to appreciate scrap material. I bought a ton of 2x2s for building my nesting box, but I also have a ton of scrap 2x2s in the 3 foot range from my potato bin project a few years ago. Sure they've been exposed to the elements for a few years, but they all seemed in good shape, so I saved the pristine boards for another project (like my tractor that needs to be built), and started cutting boards based on my brother's box. I have pictures on my phone of his box and copied it the best I could. Here are the first four boards cut and laid out on the ground. You'll find I built it on the ground before anything got screwed in place.
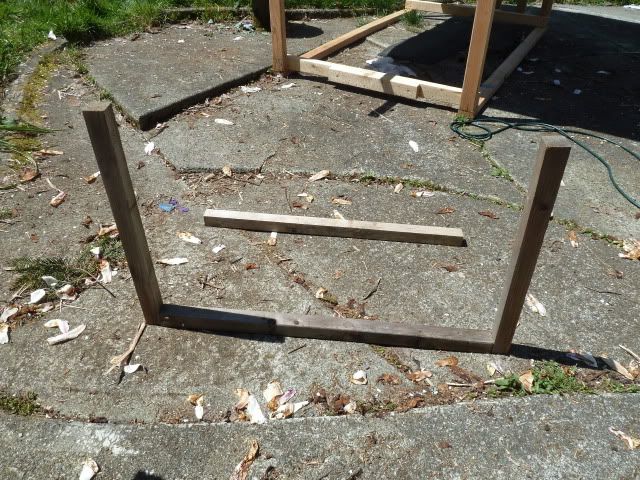
I ended up cutting the front and back walls to provide a 3 inch fall for drainage. It is a bit more than I need (2 inches or so), but what the hey, I had the room.
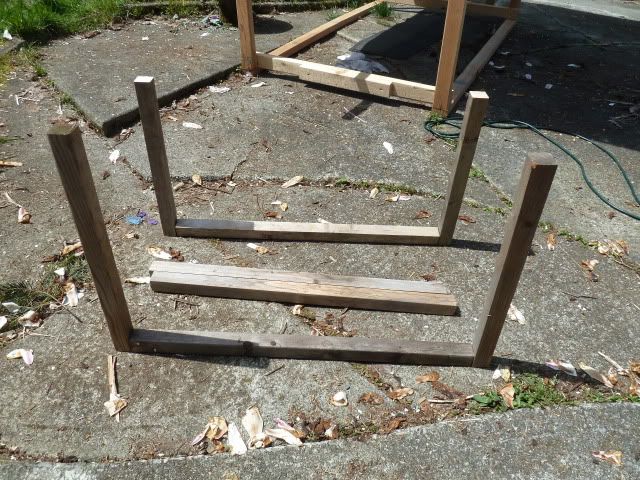
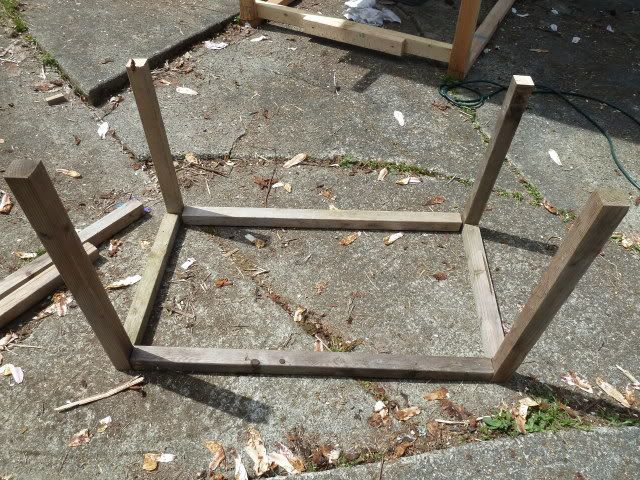
Then came yet another decision... how deep to make it. My brother wasn't answering his phone (he never does... grrr), so I ended up choosing 16 inches deep. I was finding just the right boards to fit my needs, with minimal scrap. That more can you ask for?
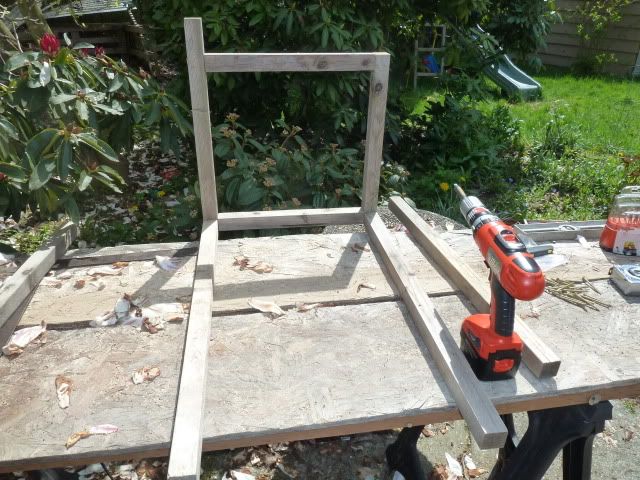
For the actually assembly, I didn't want to do it on the ground, so I moved the pieces to the cutting table. There I laid it back out, making sure I had the best side facing the chicks, even though it will be painted. Then I drilled pilot holes and then screwed it into place.
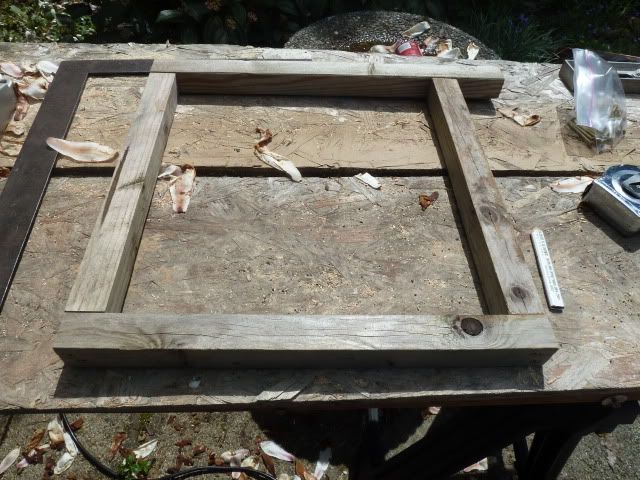
After the first side was done, I started building the box for real. It was here where I realized my brother had it right when he borrowed my dad's screw gun so he had one with a drill bit and the other to screw in the screws. Good idea, but I only had one screw gun (and it's warped to boot after dropping it one too many times), so this build was slow going.
Finally! I had it built, just the way my brother did his...
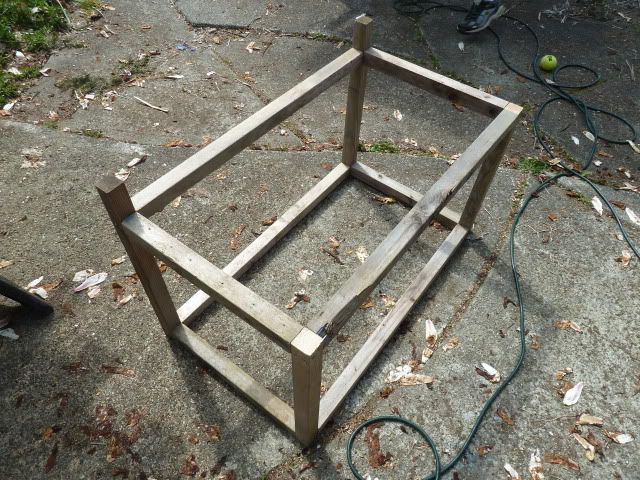
Well, not exactly. I had it built and then realized that the top cross bar needed to be in line with the top of the front wall, not in line with the back wall. Oops. So I now have two holes in the frame that don't need to be there. No biggie.
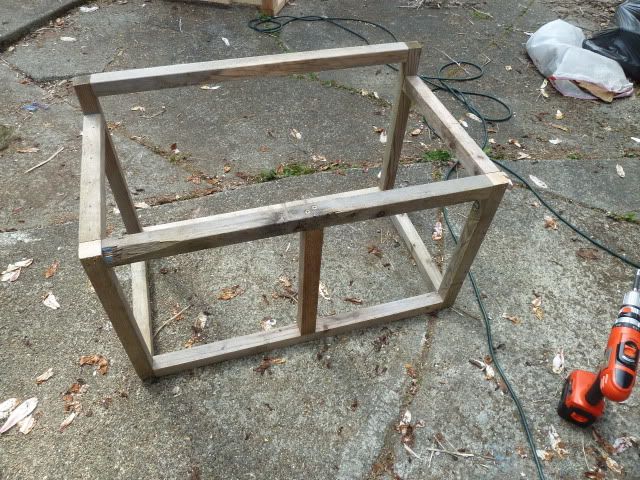
Finally, I had to decide how long of an overhang to go. Again, without any guidance, I decided on 4 inches. I was fairly pleased with myself though. After thinking about my brother having to caulk the top rafters where they butted up against the coop, I decided to trim them at some angle to make it flush with the coop. Not having my protractor handy, I guessed 10 degrees. And I was right! It turned out perfect. Yay me!

Now I know I'm not done with it, but it was at that point family obligations took over. Still, I'm pleased with the results, and I didn't have to use a single board from my newly purchased material to build this. Very cool!
Hope you enjoy this post! Let me know your thoughts.
So anyway, not that you need one, but today's yet another chicken coop post. I mean, if you think about it, the chickens are getting so big and ready to go out, that I pretty much HAVE to finish this coop. If you've been over to my brother's blog, you'll see he's almost done. So, I've pretty much let my yard go to the weeds and every dry day (we've had 4 in the last 3 months) I've worked on my coop. The last such day was devoted to the nesting boxes, and thus this post was born.
The more I've watched my brother's coop go up, the more I've learned to appreciate scrap material. I bought a ton of 2x2s for building my nesting box, but I also have a ton of scrap 2x2s in the 3 foot range from my potato bin project a few years ago. Sure they've been exposed to the elements for a few years, but they all seemed in good shape, so I saved the pristine boards for another project (like my tractor that needs to be built), and started cutting boards based on my brother's box. I have pictures on my phone of his box and copied it the best I could. Here are the first four boards cut and laid out on the ground. You'll find I built it on the ground before anything got screwed in place.
I ended up cutting the front and back walls to provide a 3 inch fall for drainage. It is a bit more than I need (2 inches or so), but what the hey, I had the room.
Then came yet another decision... how deep to make it. My brother wasn't answering his phone (he never does... grrr), so I ended up choosing 16 inches deep. I was finding just the right boards to fit my needs, with minimal scrap. That more can you ask for?
For the actually assembly, I didn't want to do it on the ground, so I moved the pieces to the cutting table. There I laid it back out, making sure I had the best side facing the chicks, even though it will be painted. Then I drilled pilot holes and then screwed it into place.
After the first side was done, I started building the box for real. It was here where I realized my brother had it right when he borrowed my dad's screw gun so he had one with a drill bit and the other to screw in the screws. Good idea, but I only had one screw gun (and it's warped to boot after dropping it one too many times), so this build was slow going.
Finally! I had it built, just the way my brother did his...
Well, not exactly. I had it built and then realized that the top cross bar needed to be in line with the top of the front wall, not in line with the back wall. Oops. So I now have two holes in the frame that don't need to be there. No biggie.
Finally, I had to decide how long of an overhang to go. Again, without any guidance, I decided on 4 inches. I was fairly pleased with myself though. After thinking about my brother having to caulk the top rafters where they butted up against the coop, I decided to trim them at some angle to make it flush with the coop. Not having my protractor handy, I guessed 10 degrees. And I was right! It turned out perfect. Yay me!
Now I know I'm not done with it, but it was at that point family obligations took over. Still, I'm pleased with the results, and I didn't have to use a single board from my newly purchased material to build this. Very cool!
Hope you enjoy this post! Let me know your thoughts.
The coop and accessories are looking good Rich! Can't wait to see it all done.
ReplyDeleteHey. I see from your pictures that you have the same kind of screw gun I have. Do you know that you can put a drill bit in the end and a screwdriver bit "inside" of it? Just mash the two orange buttons on the side of the drill chuck and the entire chuck slips off and has a place to put your screwdriver bit. Those that have the little "neck"-type shank on them will lock in and can be released with the little orange collar inside.
ReplyDelete