Wednesday, April 27, 2011

April 27, 2011

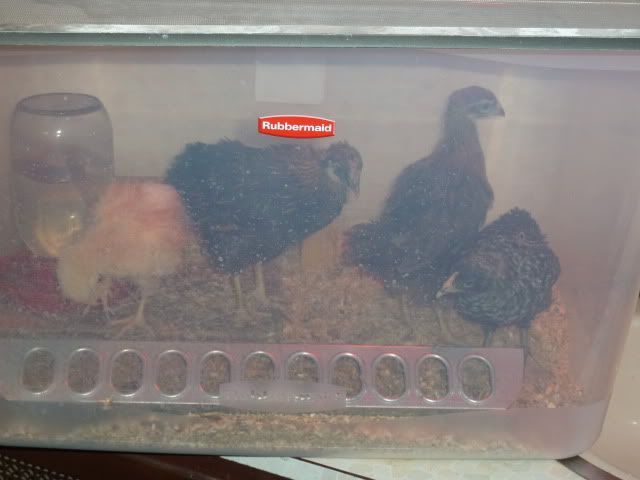
Well, I feel with this post, I'm finally catching up with myself a bit, blogging wise.  I've been dying to write this post for several days now, but it just didn't fit. This is going to be very picture heavy as I wanted to show you everything. Yes, it's another chicken post, but it represents a bit of a milestone of sorts.  The chicks are now just over one month old, well three of the four are. Buffy's one month today.  So Monday after Easter, I finally took pity on the teenagers and gave them keys to their new car... no, not a car, but a new house at least.  They've been acting crazy in their confined space, something I've read about, but never witnessed.  I figured it was finally time to do something about it before they started pecking each other.  In case you're wondering, this is how big they were on moving day!


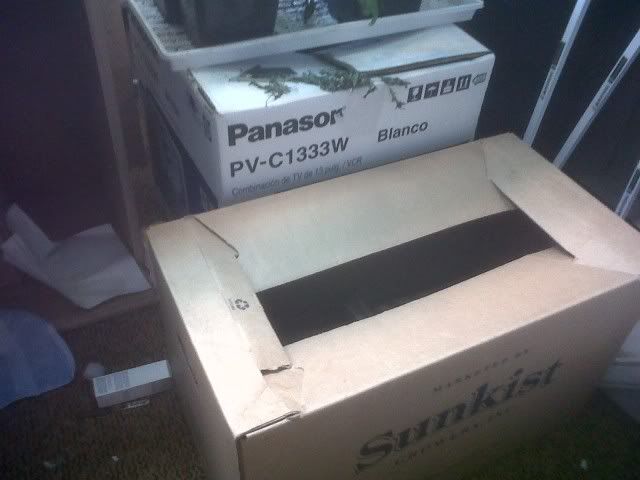
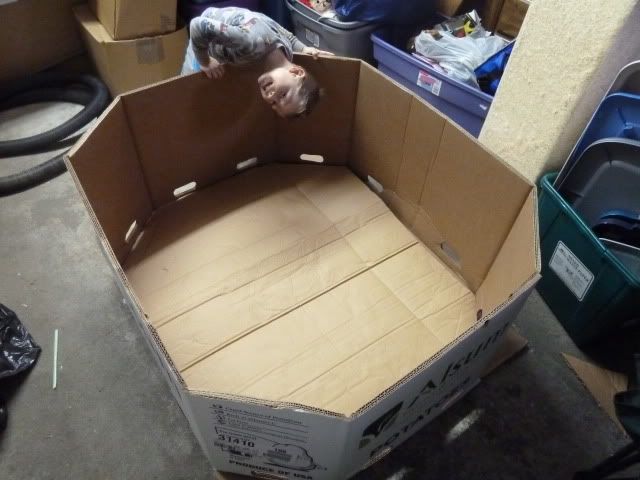
My how they've grown in 4 short weeks! So, with the help of my youngest, who is off school Mondays, we cleared a space in the garage for the huge Costco potato box and I cut the octagon and placed it in the bottom of the bin to cover the gaping hole in the middle.  Here my little guy wanted to be in the picture and in the bin, sporting his PJs.


You may notice the dozen or so holes at the bottom of the bin.  My brother's bin didn't have those, so I spent about 15 minutes cutting small pieces of cardboard and duct taping them on the outside of the bin. I wasn't worried about the girls getting out those holes, but they'd definitely kick bedding out them, which would be a big mess.  Then my son and I filled the bin with what seemed like a ton of wood shavings.  We went about 3 inches deep.


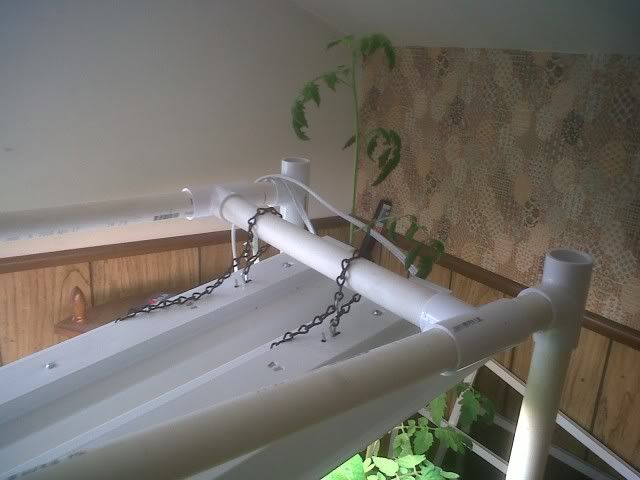
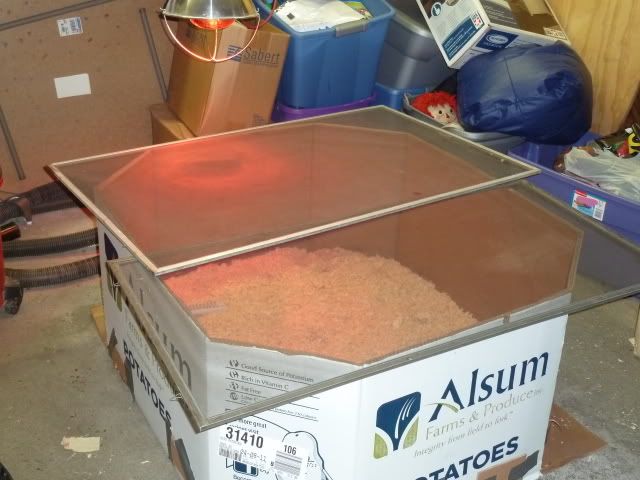
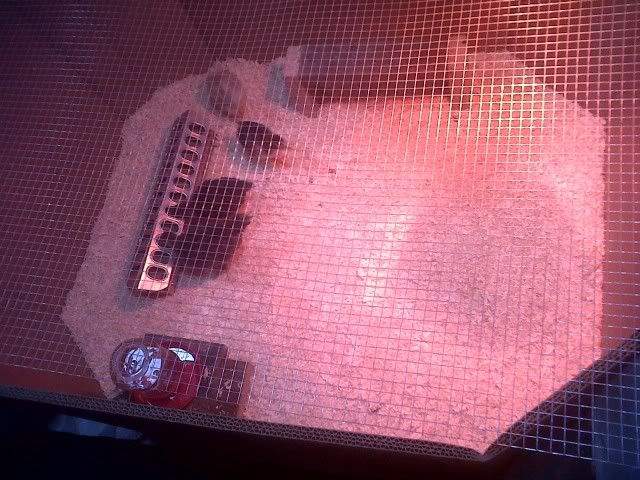
Sorry for the mess, the garage still needs to be cleared out of all the stuff we don't want or need to find a place for.  You know how it is.  Anyway, I had been straightening out the 3 foot wide piece of 1/2" hardware cloth that my brother gave me for the roof, for several days. Though when I placed it on top, I realized there was a several inch gap on either side that would be problematic.  I wasn't worried about the birds escaping as they're too big to fit through, but I didn't want them trying to escape and getting hurt on the sharp wire. So, what now? Well, I thought back to the cover I figured out for the previous brooder. I had plenty of window screens saved from our renovation project two years ago.  I've used them with limited success to shade my lettuce during the heat of the summer to stave of bolting.  Out back I had three big screens, so I grabbed two and threw them on top.  Presto! I had my lid.

Oh and I took about an hour to figure out the proper position for the heat lamp. It took my three foot chain I bought for the lamp, plus a few saved chain pieces that came with my shop lights for my light system, but I got 70 degrees.  I really should be at 65 now, but I decided to give them a few more days at 70 to ease the transition.  I've found the temp on the other side of the brooder is about 60 degrees, so in a few weeks, I'll remove the lamp altogether.


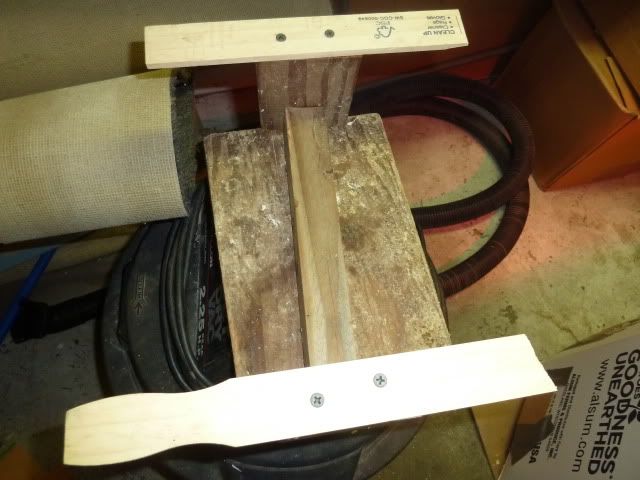
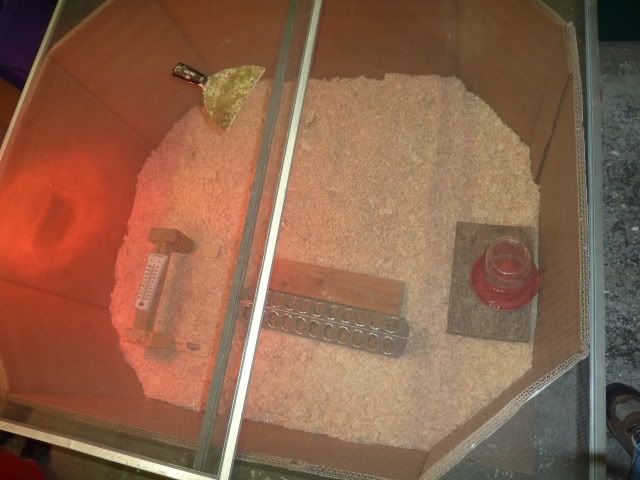
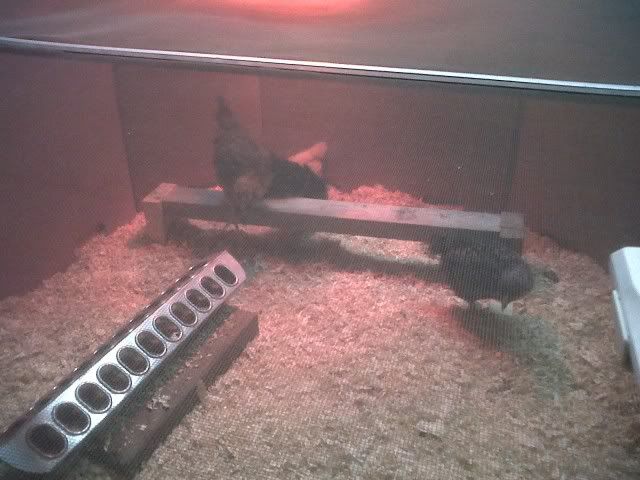
At this point, it was time to move over all the gear from the old brooder.  Boy were they confused when I took the water and food away.  It was at this point that I had to do some tinkering with the pieces to fit the new brooder, as well as, their new larger size.  For one, the 2x6 I used to keep the water bedding-free was too low, so I screwed some scrap 2x4s and 2x2s to the bottom to raise it up a few inches. Next, I took two 2x4s and placed the food on it rather than on the bedding itself to keep it from becoming covered with shavings.  Finally, I had to figure a way to stabilize the roost. Before it was braced by the 2x6 that the water rested on, as well as, the brooder wall.  Now it was just too wobbly on the bedding. So, looking around the garage, I found just what I needed... a paint stir stick.  I cut it in two and screwed it into the bottom of the roost. Good as new.  Hey, if you hadn't figured it out by now, I'm completely function over fashion.


So, here's their new digs before they moved in. 


While this new brooder was sitting empty of chicks, the old brooder was sitting empty of gear, but full of chickens...


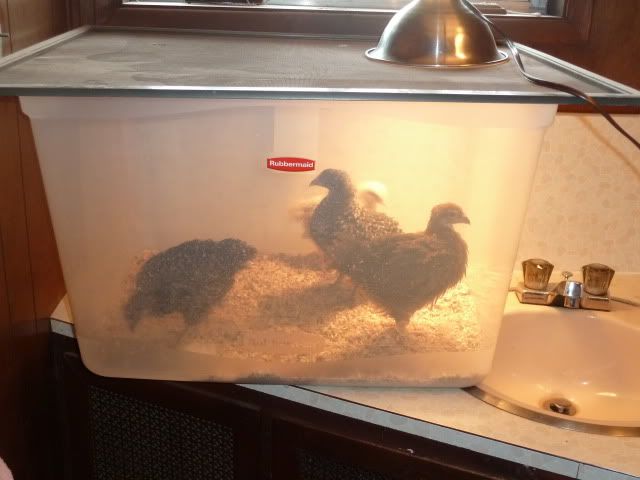
I promise this is the last picture of my spare bathroom you'll have to see.  But it is noteworthy that I made use of my old versatile cone light with just a 100 watt bulb to keep them warm while I was tinkering with the new brooder and bringing it to the right temperature.  Oh yes, I will also say that I will definitely miss having such close access to water next to my brooder.  The nearest water to the new brooder is this same sink, about 40 feet away through three rooms. Hehe, yeah, I'm showing how lazy I am.

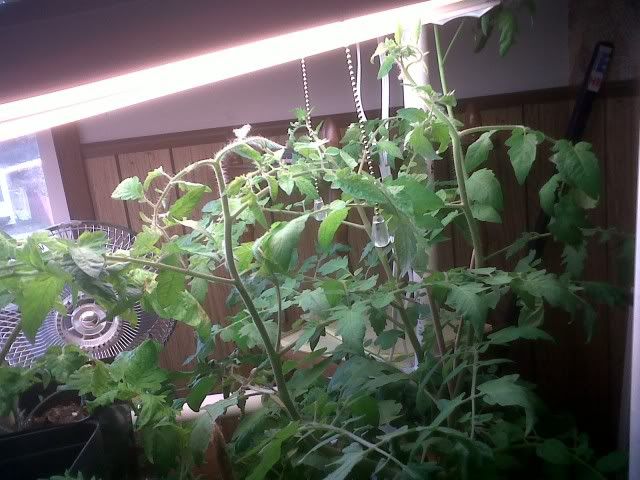
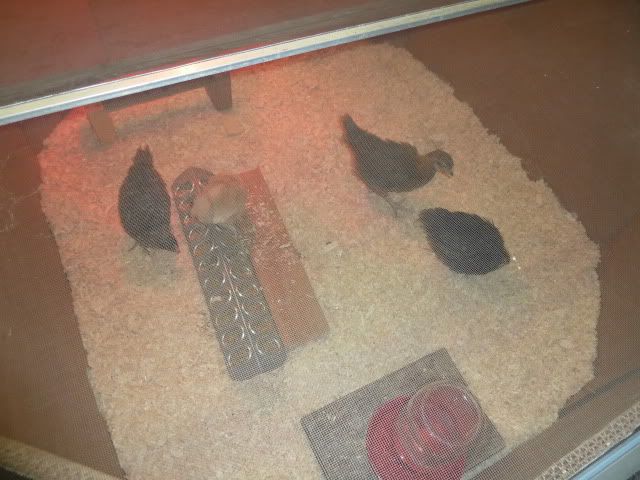
Next, it was time to move the girls.  Rather than to traumatize them by moving them in the brooder, I brought each one at a time out to the new brooder.  They all did very well, though Buffy is still skittish around me. So, here they are in their new digs! They don't look quite so big in it, which is the whole point of the exercise. Can you believe this box will only be used for another month! I shudder to think what they'll look like when they move out to their coop?


Later that night, I decided to change the roost yet again.  I found it was way too short for them all to roost on, so I grabbed a scrap piece of 2x3 from the garden and replace the 2x2. Now it's definitely long enough for all them, and it is the same size board as their eventual permanent roost in their coop.


I've taken to spending a ton more time with them now that I don't have to sit on the thrown to watch them.  I've spent hours sitting and reading my book watching them in their new digs.  They've torn up all the bedding looking for worms (or maybe the grit I threw down knowing they'd dig).  I may add a 2x2 to one side of the food to allow any of them that want to peck down into the food the ability to do so.  Though Buffy can use it, I've found she isn't eating as much as the others.  She needs to eat to catch up if she wants to be the biggest hen (she is by breed).  Another possible change is to raise the height of the roost.  There's not much room to go up in this box, but I could increase it a few inches.  I'd like to transition them better to the coop, where the roost will be two feet off the bedding to be higher than the nesting box. 

Anyway, at this point, I thought I show you my brother's brooder box for comparison purposes. I'm not sure everyone that reads my blog reads his too.


Similar, but different for sure.

Hope you've enjoyed my chicken adventure towards greater sustainability!

Tuesday, April 26, 2011

April 26, 2011

Man, my blog schedule is filling up. Must be Spring! But I wanted to get this post out there, so it'll offset the coop construction posts.

I was out the the garden the other day, taking my tomatoes for their walk and checking on the rest of the garden.  What I found was my spinach bed was sprouting like mad. 


I've been reading my garden buddy's blogs and found many using row covers for their spinach to keep the leaf miner flies away.  I've had issues every year with leaf miners, so I figured I'd give it a try.  I saw them with their fancy mesh covers and thought... "I've got something like that."  Sure enough, I'd saved the mesh covers from our recent couch purchase for gardening.  They tear easily, but I found a small one that was in good shape.  So, I threw it over the bed and weighed it down with some scrap 2x2s my kids were playing with and left all over my garden.


That was all fine and good for a few days, but when it rained, the mesh would be plastered to the ground. That couldn't be good for the poor little seedlings.  So I had an idea.  I could use some of those scrap 2x2s to raise the row cover!  I just leaned them up against the side of the bed, sort of wedged between the bed and the hoop cover stands.


It wasn't as easy as I'd hoped, but I manged to wrangle the row cover over the bed, held up by the 2x2s.  It doesn't have to hold up to a Fall wind storm, and it's very temporary, so I don't care if it looks good.  As you're likely well aware by now, I'm a function over fashion kind of guy.


Since this time, I've thought about maybe throwing my hoops up and draping it over them.   I'd probably need one of the bigger covers for that.  Of course, this is only temporary, RIGHT?!

How long does this need to be up?  Watering's a pain, but not nearly as painful as destroying ruined spinach! If it needs to be up for a long time, I'll definitely get the hoops out and make something more user-friendly.

Thoughts?

Enjoy your garden!

Monday, April 25, 2011

April 25, 2011

Last Friday we had the best weather of Spring, meaning it didn't rain and the sun was shining for part of the time. Knowing this was likely going to happen from the weather report, my brother and I had a plan.  At 8 AM I called him and my father-in-law to set the ball rolling. My youngest cried and cried when I said he couldn't come, so my folks offered to watch him.  Dropped off my eldest at the bus stop and raced to Home Depot.  There I cleaned them out of decent 2x3s and bought a handful of sheets of 3/8" CDX plywood.  Finally, I picked up most of the hardware needed for the chicken coop for the girls.  Yes, Friday was the day it all started in earnest!


We ended up doing the initial assembly at my folks place as they have a flat paved surface next to their house.  We set up there and started cutting.

Sorry, no pics of me, as I was the dolt behind the camera, on my knees screwing in boards. My father-in-law used his nail gun to keep the boards in place for me to then screw them in.

While the wall framing was on the ground, we took the opportunity to put on some of the plywood.  Then we stood it up and carefully joined the two walls together.

You can see the gap at the top of the facing wall.  That is going to be the primary ventilation for the coop.  It will be 3 SF which is not quite the recommended amount for 3 birds, but I am still unclear on the proper placement of the louvre vents to create good air flow without creating a draft.  I figure they'll be near the top in the middle to keep any air from passing by the roosts on one side and the nesting boxes on the other. I've read tons on ventilation, but the fear of creating a draft is really worrying me. 

Oh, and In case you're wondering, I made the front (facing) side 7 feet tall to insure I had enough space to have the nesting boxes about 10 inches higher than the floor to allow for using the deep litter method if I so choose, while still having the boxes be higher than the bedding.  Then the roosts have to be higher than the nesting boxes, all while allowing for an indeterminate, as yet, number of lights or heat lamps above that.  Since I had 8 foot studs, I had the latitude.  We also made the front wall 4 inches higher than the back to allow for rain run-off for a slanted roof.  Speaking of the roof...

Man the rafters took a long time.  Each block between them had to be measured and cut to different lengths.  We didn't maintain an exact 16 inches on center. It's a chicken coop after all!  The overhang will be about 1 foot to hopefully allow for some rain protection while I'm servicing the unit.  Kind of a must for the Pacific Northwet.  It also will keep MOST of the rain out of the vent area, which would add water to the coop in a bad way.  Unfortunately there's no way to avoid getting water in if we get vertical driving rains, which happens some days in the fall.

As you can see on the left hand side, below the vents (with the block cripples) is an approximate 4x3' door frame that will be cut out, framed with 2x2s and hinged for a service door, right at waist level for me so I can reach all the way in.

At this point we stopped to cut the frame boards for my brother's coop so we could determine a list for Lowes the next day.  Both stores are equidistant from my house and since I bought all the 2x3s Home Depot had and needed 15 more, I got them from the crap Lowes had for sale.  I must have went through half a pallet to find 15 boards that weren't bowed, wracked, overly marred or split.

Although the coop is sitting next to my folks house in the front yard, I'm not afraid of anyone taking it.  It took my brother and I to lift it slightly and walk it 10 feet, and we're not even half way done adding weight to it.  It seems that 2x3s and 3/8" plywood didn't reduce the weight much.  However, I feel sorry for my brother who's using 2x4s since he had so much scrap (about half the frame's worth). What he's saving in money will be offset by the weight of the final product.  It's been decided that before we add any more weight to it, we're moving it to my house.  It's going to be tough enough to get it into my brother's truck to transport it here as-is, let alone when it's finished. 

We only worked Friday, and not Saturday, despite the nice weather, because everyone wanted to get ready for Easter.  Since then it's been a combination of bad weather and a family get-together, so nothing more's been done, but I plan on doing more just as soon as the weather improves, and certainly not waiting for the weekend. Boy the girls are getting big, I figure we've got one month to finish this before they go outside.

Hope you've enjoyed seeing my coop progress.

Enjoy your garden!

Sunday, April 24, 2011

April 24, 2011

Happy Easter all! I hope you spent this time with family and friends and all the kiddos enjoyed it as well. Mine sure did, despite missing the egg hunt at our local nursery twice (we went yesterday too, a day early).  We showed up at 9 am and it was "over" having started at 9.  Ah well, it gave time for the Easter Bunny to make it to our house which was the main reason for going. Everyone knows the Easter Bunny won't come if you are watching... just like a pot won't boil or seeds won't germinate.

Anyway, I've not been posting much of late, as I've said, because my wife's been out of it so I've been stuck doing everything for the family.  That hasn't meant I haven't been gardening, just not blogging.  Priorities, I'm sure you will agree.

As much as there is good news on the chicken front to share, as Alton Brown of "Good Eats" fame likes to say, "that's another show."  This post will be all about tomatoes, namely extricating them from my light system and starting the whole hardening off process.

As you may remember from my last garden post, I was at the end of my rope... er... chain again upstairs under the light system, and I didn't want to figure out a lower box to set the tomatoes on, so I'd left it alone for far too long.  When I finally tried to move the tomatoes, several of them had actually grown AROUND the light bulbs, making me damage some branches removing them.  In hind sight, I guess I could have taken the bulbs out, but I did it late at night and just wanted it finished.


As for the dead branches lower down, that's a lack of water. I just don't have big enough pots to pot up these babies another time. I've never had to before as they'd be much smaller when it was time to plant them out into the SWCs.  This was a test to plant much earlier.  I should have planned ahead and scrounged up bigger pots like my brother did.

So, one by one, with minimal light in the room as I couldn't get to turn on the lights manually with this extended setup, I moved them downstairs to the unheated garage. They would spend each night in that room sitting on top of my all-purpose chest freezer that is about the only flat surface of the house that is regularly cluttered but always cleared as we need to get things out of it (if only the whole house was like that).  It took an inordinate amount of time, but finally they were downstairs and ready to rock.


The funny thing about the picture above, is that I couldn't fit all the plants into the picture.  I could either get the bottom of the pots, or the top of the Black Cherry tomato plant.  Man has it skyrocketed.  It won't even say straight up with a stake in it, it's so top heavy.  Actually, many of them are having troubles with the staking.  They really need to get hardened off in a hurry.

The next day was the first sunny day in a very long time.  I needed to get them in the best light possible as they would be up against the east side of the garage, which gets full sun from dawn until about noon.  Unfortunately where it sits it's blocked by a garden bed.  So, to raise the plants up above the bed, I grabbed two 5-gallon buckets and threw a few 2x2s over them to create a make-shift table.


In case you're wondering, if I ever get the funds to build or buy a greenhouse, this is the only spot for it.  Not the ideal location given the sun conditions, but I could fit a 6x6 greenhouse there if necessary.

Anyway, the tomatoes went on two seedling trays to give them room to get enough sun.  Boy to they look ready to plant!  Too bad they weren't hardened off.


Fast forward three days and various weather conditions (they're protected from the rain by the eves), and they don't look very healthy, in fact, my Sunset Red Horizon is on death's door, and it's one of the smaller plants.  Maybe I shouldn't have left them out there about 10 hours each day, sometimes until it was very dark and the temps had dropped to the mid 40s, but life commitments made bring them into a light setup after a few hours impossible.  I sure hope they come back.  I'd hate for all this work to be for not.

Enjoy your garden!

Thursday, April 21, 2011

April 21, 2011

Well tomorrow's Earth Day, and I'm not ready.  The weather's been so cold here that I haven't even taken my seedlings for a walk yet.  They're currently overgrown up in the light room, but it's all I can do to let them grow AROUND my lights. I need them out of there so bad!

My tomatoes are so big, they don't need staking as much as they need tomato cages already! I am dreading moving them once, let alone taking them in and out of the garage every day for a week!  Actually, I guess after I finish this post, I'll brave moving them to the garage for the evening as the lights will be just about turning off by then.  Then tomorrow's supposed to be fairly nice, so I'll put them under the eves in the garden area, fairly well protected from wind and rain. 

I'm beginning to wonder if starting them the first of the year was such a good idea?  I guess if Mother Nature had cooperated and had any sort of Spring this year, I could have planted them out early and been done with it, but we've had hail, wind, freezing rain and nighttime temps as low as 27 degrees.  I call that an extension of Winter rather than Spring. /sigh

I guess I've been hiding out and hiding behind my sick wife as I do everything to take care of the kids and her. I haven't even taken any pictures. I promise I will as I move out the seedlings for the first time, and everything else that happens tomorrow.

Yes, I promise tomorrow will be a productive day.  I have called all parties and intend to start the coop construction process! I even hope finally get the girls out of that tiny brooder and into some larger digs.

Hope you are staying warm and are enjoying your garden!

Sunday, April 17, 2011

April 17, 2011

Sickness still reigns over my house this weekend, so despite a beautiful day today, nothing got done in the garden.  So, in order to have SOMETHING to post tonight, I took another video of the chicks.  By the way they've grown, I'm not sure I can still call them chicks even though they're not quite a month old, but here are the girls.


As I say, Sunday's the day I've decided to totally clean out their brooder.  I did this knowing I may very well not be using this brooder later this week.  My brother called tonight and we both had the same idea.  We cam to the conclusion independently that our chicks were getting too big for their tote brooders, so we are both planning on setting up the Costco produce box for the brooder.  Looks like I'm going to have to put it in the car bay of the garage, as the kids have totally taken over the play room bay, as they should.

Anyway, I took some pics of the girls and thought this was the best one.
I love the close-up of the three oldest enjoying the fresh food. Twinkydink is doing what they all do these days, dive right in by standing on the feeder.  They're big enough now that I may not put a board up against it for them to stand on to peck at the "ground" They don't seem to use it.  Well, Buffy does as she's a week younger and a lot smaller still.  I'm looking forward to her exponential growth over the next few days.

Enjoy!

Friday, April 15, 2011

April 15, 2011


I realized it's been a while since I posted about the girls.  I know I've said they've grown, but I hadn't had any pictures to back it up, and I know some of you have been anxious to follow my chicken adventures.  So, instead of taking a bunch of stills, I decided to take one video tonight.  The girls are hilarious in this one, but be warned, you get mooned and dumped on in this video, so it's not for the faint of heart. ROFL


As I say in the video, they're eating well. In fact, all they have space to do there is eat, poop and sleep. I have a box for them, but need to do a better job of clearing a space for them and their new produce box brooder.  And the reason you haven't seen it is that my garage is a mess (again) and I'm ashamed of where they'll be residing for the next month or so.  That and I'm stubbornly keeping them in this brooder until they're a month old, which will be on the 23rd.  Amazing growth in a month, isn't it?!

Enjoy!

Wednesday, April 13, 2011

April 13, 2011

No pics today, I just haven't taken any good ones as the camera is charging.

Man this weather's crazy! It's warm one minute, then near freezing the next. My plants don't know whether to grow or go dormant.  Unfair! 

As April 15 is our traditional Last Frost Date around here, I really should be getting my tomatoes out for a walk by now.  They need to harden off before they go into the SWCs and become unprotected other than tomato cages.  Alas, I'm not happy with the conditions to harden them off, even if they are staked.  The wind was so bad today they wouldn't have stood a chance.  Not sure that the rest of the week's much better.

I guess what I need to do is to bring them out and shelter them somehow from the wind. Unfortunately that's not even the worst of my problems with my tomatoes.  They're so big and entwined in my light system frame that it's going to be a pain in the rear getting them out.  I'll water the plants tonight but save tackling the extraction for another day.

Other than that, I'm just waiting for plants to grow, which isn't happening with this wacky weather we're having.  There has been signs of life in my beds where I direct sowed various varieties of seeds last week, but it could very well just be weeds popping up.  Time will tell.

Lastly, the chicks are entering their gawky teenager phase, so maybe it's good that I don't have pictures of them.  Their feathers are discheveled a bit and getting rougher, they're growing taller but not filling in as fast, and they're getting real antsy, wanting to borrow the car, I mean get out of their brooder.  I bet next week they'll be moving out to the garage into the potato box I got from Costco.  Oh, and that coop sure isn't building itself, hehe.

Yep, I've got my work cut out for me.  I hope your garden is keeping you busy!

Saturday, April 9, 2011

April 9, 2011

I've been dying to get this post out, but the girls deserved yesterday's post all to themselves.  Yesterday I went up to do my every-three-day musical plant game, only to find the reservoirs dry and the plants bumping the lights again.
The good news is that the closest two that are still on the shelf are growing stalky rather than tall.  That's a good sign for appropriate growth.  The rest, despite all attempts to avoid it, are getting a bit leggy.  I may need to stake them more when I harden them off, or they'll flop over.  Speaking of which, do you think it's time to start doing that?  I'm nor relishing the prospect of moving them in and out of the house on those flimsy trays, let alone extricating them from the framework of my light system.  Eek!

The bad news is that this is what I'm dealing with with the first plantings...
So, it was time yet again for another furniture change.  Let's see, what do I have laying around the storage room.  What am I going to do when the kids move up here and I can't use this great southern exposure room over the garden for my light system. Maybe they won't mind sleeping on the couch for a few months each winter? hehe  This box will do...

No pics were taken during the moving process, because I definitely had my hands full with moving out a monitor box and moving in an orange crate while holding a tray full of heavy tomatoes stuck inside the frame of my light system.  How I did it I have NO idea, but here is the result...
I figure this will give me almost a week.  Maybe by then I'll just move them outside during the day and in the dark garage at night. It would throw off their light schedule, but isn't that one of the points of hardening off?  Oh, and what did I find when I was watering them?  One of my Legend tomatoes had set flowers!
I never know whether to pollinate them or pluck them at this stage.  This plant's pretty good sized (not one of the huge ones but the next biggest).  Sure would be nice to have a few early tomatoes, but I hate to have the plant devote all it's energy to tomato production rather than plant growth.  Of course they'll get a shot of fish emulsion when planted out, in addition to my all-purpose fertilizer and Epsom salts.  Thoughts?

Lastly, I was going to create a separate post on this, but it really doesn't deserve it.  I've been playing with milk-jug cloches with some interesting results.  Of course I simply cut the jugs in half and poked vent holes in the "tops".

Then I simply dug them into the soil a bit over the top of my seedlings. In this case it was my tender broccoli and cauliflower starts, one of which got eaten by slugs (see a post a few days ago).

What I found was that the seedlings wilted quickly, kind of like a greenhouse effect, so I was always removing them on "warm" days, as in around 50 degrees. Tonight I just left them off all-together.  I've sprayed for bugs so let's hope the slugs stay away.  Maybe tomorrow I'll hit them with a shot of fish emulsion to jump start them?

Enjoy your garden!

Friday, April 8, 2011

April 8, 2011

Man am I exhausted!  Yesterday was an entire day of trying to replace a broken kitchen faucet (and to add to Murphy's Law, today the bathroom faucet broke).  My arms and back were sore from that one, hours under the sink.  After these projects are done, I should have enough hours under my belt to be a journeyman plumber... just kidding, I'm useless.

Today was beautiful weather, the first day without rain in 47 days, so I'm told, so I took the fleeting opportunity to mow the lawn.  Just to be nice I mowed the front first, and as a result, I'm hoping it won't rain tomorrow so I can mow the back for the kids.  Ah, to have chickens to do this for me.  You see, on top of being sore and tired, I'm highly allergic to grass, especially the fresh cut kind, ROFL.  But the compost likes me.

First I grabbed the very full kitchen compost bucket, and the much lighter chicken brooder compost bucket, and mixed them with some grass the kids "cut" with their scissors the other day.  I added them to last fall's leaves in the empty compost bin, which will be this year's hot compost area.
I must have been very tired because I didn't even snap any shots of the HUGE pile of grass clippings and various brown materials dumped on top of this.  I must have a 2 feet tall 5x5 pile now. Unfortunately I was too tired to de-winterize the backyard hose bib and hook up the hose, so I didn't add any water to it like normal.  Here's hoping it will still heat up from the moisture in the kitchen compost and the grass.  If it does, I expect it will be cut down to 6 inches in less than a week.

Update: I snapped a shot today and didn't want to clutter a post with it, so here's the loaded compost bin with 2 feet of grass clippings about 5x5.


Well, it's only fair that I've been talking so much about my garden activities lately, I should really show you just how big the girls have grown in less than 3 weeks.


And just to show off how beautiful they are, here are some of my favorite shots from the last week.

Here is Summer trying to fly away from me when her sisters caused a commotion.
Aren't those wings beautiful!? And so big too.  Some day I'm going to have to cut one of them. Not looking forward to that.

Here's a pretty common sight these days.  I think I mentioned that the Barred Rock learned she could jump from the roost to the top of the mason jar water container.  I finally caught her on film.

She likes to peck at the screen.  Makes me wonder if I'll get a month out of this brooder after all.

Well, short post for tonight. I have plenty of other material to share so hopefully I'll get many more posts out over the weekend. 

Enjoy!

Wednesday, April 6, 2011

April 6, 2011

Quick post for now. I need help!

What's eating my broccoli seedlings?
I had it under a milk jug cloche that was fairly well seated in the soil.  I wonder if it's not the same thing that's continuing to eat and eat again my butter crunch lettuce head in a different bed?

I couldn't log onto Gardenweb for some reason, so I'm pleading to you all for advice.  What is it and what do I do about it? 

I tried to look it up on the net and found only cabbage moths, which I know I have problems with, but have not seen any moths yet this year.  Also, remember that my beds are 16 inches tall and surrounded by inhospitable gravel for paths.  I thought of slugs, but haven't seen any and have no idea how they'd have gotten in with those obstacles to overcome.  Unless they came in in the compost?

Thoughts?  Thanks for any and all comments!!

Enjoying the sudden snow storm here in the PNWet?

Tuesday, April 5, 2011

April 5, 2011

So, to give equal time to both my gardening and animal husbandry obsessions, this post will be about plants rather than chicks.

Despite the rain, mixed with heavy rain mixed with light showers over the past week, I found time to make it out to the garden.  Mostly I was out there to plant what NEEDED to be planted out.  However, I couldn't help but admire the growth (albeit slow) of my initial salad green plantings.  I definitely can start harvesting outer leaves of these for salads.  That said, we prefer to wait until more items are ready to go into our salads, like radishes, carrots and the like.


During a break in the weather, I took some time to augment my tiny bed #3 with compost, and plant a mixture of Savoy Bloomsdale Spinach (from Laura) and my traditional Space spinach (from Territorial). Given the size of the seeds, and wetness of my compost, I didn't even bury them, but rather used the board trick I got from Laura.  No clue if this will work or not, but it is worth a try.  I mean, who has a supply of dry sifted compost on hand to sprinkle 1/8" deep over a bed, hehe?


I also did something similar to several varieties of carrots to replenish our supply.  The ones that overwintered are very hairy and need to be pealed to eat.  Speaking of which, it is about time to harvest them so they don't go to seed.  Thoughts on what to do with carrots you need to peal to eat?  Hmm?

Anyway, now to what I actually went out there to do.  In the back of bed #4, I augmented the soil with a kitty-litter-bucket of compost.


And with my hand trowel, I worked the compost into the soil a bit, chopping up tons of worms in the process.  Poor little guys. This back portion of my only bed without a trellis will be the home of my initial plantings of broccoli and cauliflower. 


This season I'm planting more cauliflower than broccoli, as my wife likes it better, but I am planting a ton of it to freeze for the off season.  My goal is to add it to mashed potatoes, saute it with bread crumbs, use it in stir frys, etc. Don't these seedlings look good?


That taken care of, it was time to turn to my flat of succession salad greens.  First to be planted were my green wave mustard green experiment.  I'm sure long-term readers recall my fascination with mustard greens, leading back to my trying one from a local CSA.  The rainbow colored wavy leaves had a nice mustard bite to them, and would be perfect to add to our salads since I don't like to use dressing for home grown salads.  Unable to find the variety I knew I liked, I have settled for this variety from Territorial.  I went with two plants to see how it grew and if I'd like it.  They germinated well, but were slow growing under lights.  I wonder if they'll take off in the ground?


Then, as the rain began to pick up, I raced to get rid of the rest of my salad green seedlings.  It was very easy to peal apart the soil blocks from their neighbors and throw them in a shallow hole, pressing the compost in around them.  For the seedlings that were growing in the wrecked soil blocks, I did my best to plant them in straight compost.  It doesn't look pretty, but I'm hoping it all grows in nicely as spring moves into high gear.


Oh, I forgot, I also filled in the row of green onions above the salad greens, and filled in radishes where I could find space.  I still remember the first year I planted radishes.  The package said 22 days, so I was expecting to eat radishes every month.  Wrong!  The first planting took 5 weeks to germinate and mature.  It wasn't until my late spring succession planting that I got anywhere near the 22 days it published.  Deceptive advertising, ROFL.

So, now my garden is coming along nicely.  I still have space in the back of Bed #1 (above) and in the front of Bed #4 when I remove the carrots.  Not sure what I'll plant in those places.  Maybe some beets and a squash plant or two, both for roasting.  My brother introduced us to them last fall and I wanted to grow a limited number of each to try my hand at adding variety to our veggie diet.  As I've said many times over on NW Edible, I wish I could cook half as good as the former chef, now stay-at-home mom and urban homesteader Erika.  /sigh

Enjoy your garden!

Monday, April 4, 2011

April 4, 2011

Man, I can't believe it's been so long since I posted. I have no idea what I should talk about, so many little things have been going on, each could result in a short post that I should have made if I had been thinking about it instead of watching for comments. Hehe.

I guess this will be a chicken post and tomorrow I'll throw together a garden one.

First off, I just realized I've taken a few videos of the girls and hadn't posted them here.  Shame on me.  I figure to get them both in, I'll use the old ruse of "Look how much they've grown!"... think it will work on you?  Well, here's one of the first three chicks on the second day.


And now for the second video taken a few days ago. My how they've grown!


Now that that's done, I can move on to more trivia about my birds.  The first bit I'm happy to say is that Summer (our Welsummer) lost her outtie belly button yesterday. I was cleaning the brooder and she was sitting on her roost, showing me her tail, and presto, it was gone.  I'm very happy about this as the risk of a pecking accident that could result in an infection was high.  Now it's gone and she can be safe around the little brute of a Buff Orpington.  Anyway, here is a picture I took with my phone while she was being cooperative for a change.  She still likes to jump from heights.


To show them in their new digs, with a configuration of the brooder that still is in effect today, here are the girls in their freshly de-papered home.  Funny that they must have gotten their dust baths out of their system in the transfer brooder, because they really haven't tossed the pine shavings all over their brooder.

Speaking of the transfer brooder, it's much shorter than the regular one.  So much shorter, that Summer can see over the side when she jumps, trying to get to her flock.  Note to self, don't move her first, but second so she has company.  Maybe she remembers her day of isolation in that bin.  She really hated that.

The next shot below is one I took zoomed in from outside the bathroom.  I rarely get to see them sleeping because they jump up and hide when they see me. Notice how Summer is on the roost with her #2 while the others are lower? Classic pecking order stuff.  Fascinating!  Oh, I don't worry about Buffy the baby Buff Orpington being lower than the Barred Rock, she probably was cold so wanted to sleep under the heat lamp, while the others want to sleep as far from it as possible. 


I've since raised the heat lamp a bit early.  I figure Buffy can sleep on the corner of the roost under the light if she's cold.  The others had their mouths open (panting) a bit much for my liking.  Yet another reason not to get chicks too far apart in age.

The last picture is my failed attempt at showing them standing straight up.  They are getting so tall when they want to extend their necks up!


So, we've got names for three of them, and having kids that are 7 and 4, none of the names are profound... The Welsummer is Summer; the Buff Orpington is Buffy; and the Golden Laced Wyndotte is Dot, though Jinny says it's short for Dorothy.  My eldest is trying to name the Barred Rock, though he's only come up with Shamrock so far... we're hoping for something different. Hehe.

Oh yeah, lastly, I posted these questions on BYC, but in case any chicken owners have thoughts out there, I'm all ears.
What kind of pooper scooper do you use with shavings?

I recently took them off paper towels and have them just on pine shavings.  The trouble is, I don't want to dump all the pine shavings every day.  Do you folks simply use a litter box scoop like for cats? 

I've heard folks say they use one designed for reptiles, not sure what one of those is or where to get one?  I can see having the ability to attach a long handle to reach into the coop later, but for now, something short will do.

This morning I just cleaned off the board they use as a step ladder to peck down into the feed tray and to drink from (need to find a good scraper for that too). 

Seems I've got a bunch of supply questions.  What do you folks suggest that works for you?

Enjoy!