During a pretty bad storm, the likes we don't normally see outside fall and winter, my plants spent time in the garage rather than getting blown around and pelted with rain. I readily admit our storm wasn't anything close to those storms in other parts of the country. The only reason I mentioned it was that it is totally out of character for us here in the Seattle area at this time of the year. You have to admit though, having plants indoors yesterday, or at least under cover was a good thing. I certainly wouldn't have wanted my tomatoes to look like my mustard greens.
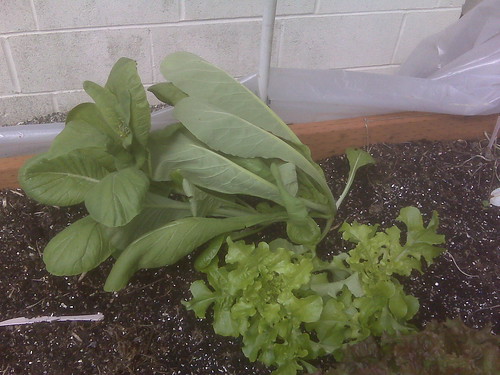
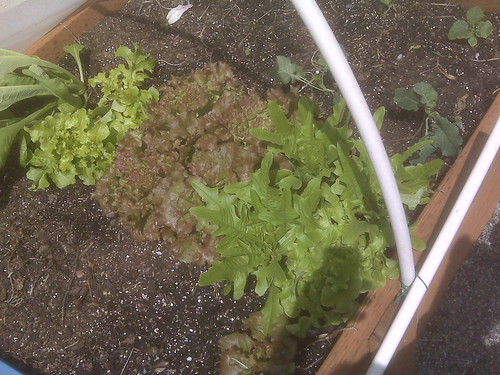
I'm not too concerned, they're going to seed anyway, and way too fast. Definitely not the variety for me. Besides, the one I fell in love with was much frillier around the edges. I'll keep looking. The rest of my lettuce is really rockin'.
That, and some of my more leggy and tall plants survived the winds quite well. Look at how good the broccoli is doing!

And...
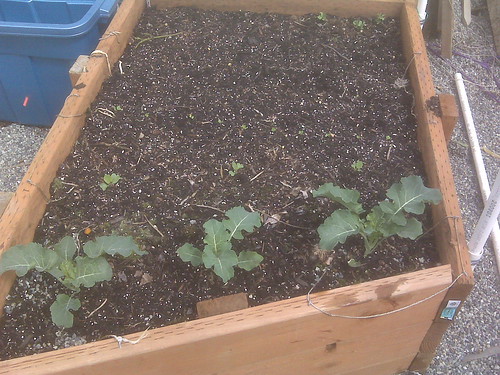
Hehe, yeah, I've got tons of broccoli. Shame since I was shooting for a similar amout of cauliflower instead. In case you're wondering, the cauliflower is right behind the broccoli. I had not intended them to be so small, but it took several attempts to get them to grow. Oh, and those emtpy squares behind the cauliflower will be more cauliflower, followed by peas that are just now growing up a bit. In between the two rows of cauliflower I squeezed a row of radishes. I figure I could get two radish crops in the amount of time it will take the cauliflower to crowd them out. /sigh
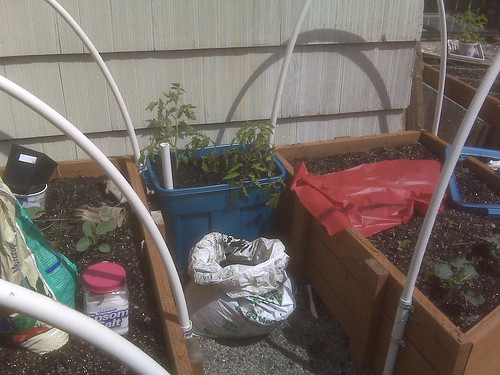
Well, the mini-garden tour out of the way, it was time to plant out some tomatoes!
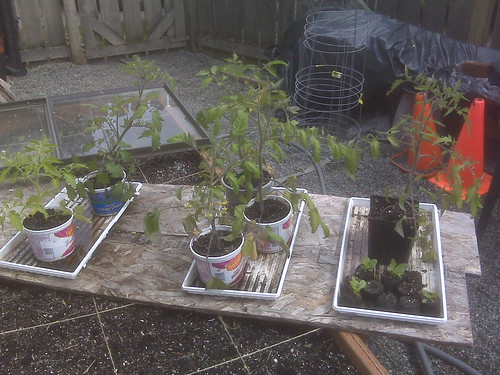
Hehe, I bet you're tired of looking at those sorry warped planks. There was very little method to my madness when it came to pairing them up. Since I can't figure out which is which (besides the Bloody Butcher which is a potato leaf variety), I went by similar looking plants, or ones that were similarly far along. Not very scientific.
So bear with me while I share the process for posterity...

Notice how I created a ramp for the stem/root system to run up on it's way out the top. I did that last year and it seemed to create nice sturdy root systems. I used the virgin Mel's Mix until it was gone, then I switched to the used potato mix amended with coffee grounds. When I empty the bins this year I will probably put them in with the finished compost to recycle it that way and then amend the compost with vermiculite and peat moss for the bins next year. It's not the best way to avoid diseases and pests, but I hate to get rid of perfectly good growing material.
Don't they look silly sticking out at an odd angle? And to think these were the two tallest seedlings!

I just love this shot of my working space, with everything laid out in unused squares of the beds on either side, hehe.
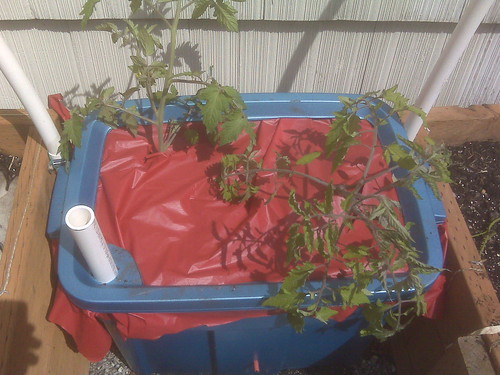
Now to add the red plastic mulch. Jen had already pre-cut it at the SWC party, but actually installing it was the hardest part of the entire process. Cutting the holes was done by marking it laying on top of the plants, then slit open on the cold-frame window with a razor blade. Then came the really hard part. Carefully workign each branch through the holes I created, then sliding it over the fill hole. Thank goodness tomatoes are some of the most forgiving plants because the amout I man-handled them today, cukes would have keeled over for sure.

Not much of a change, but then I locked it all down with the lid.
I couldn't help thinking at this point, that these bins are slightly bigger than the Sterilite one I made last year. I'm not sure I will be able to install my 2x4s for my trellis with these in place. It looks like I'll be moving them after all. Oh well, I'll cross that bridge when I come to it. Now all I needed to do was to fill the reservoir.
Gotta love the cheap drinking straw overflow valve! Works like a charm, and so easily replaceable.

In planting out the next two, I decided to position the branches for optimal spacing in conjunction with the other plant. I know it won't make a big difference once they grow 5 feet tall, but it gave me something to do. Besides, this picture just looks pretty with all the blooms.
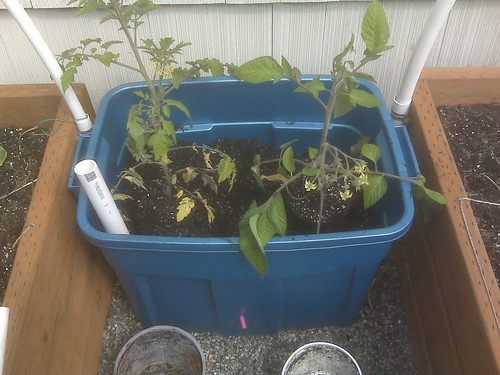
I wasn't sure if I should prune the yellow, dying branches or burry them. I made the executive decision to simply burry them. They'll either revive themselves as roots or they'll compost in place. Either way, I've read that tomatoes are narcissistic in that they like to be composted with their own cuttings. That and not to compost dead tomatoes as other plants don't like them. Hehe, a little random trivia for today's post.
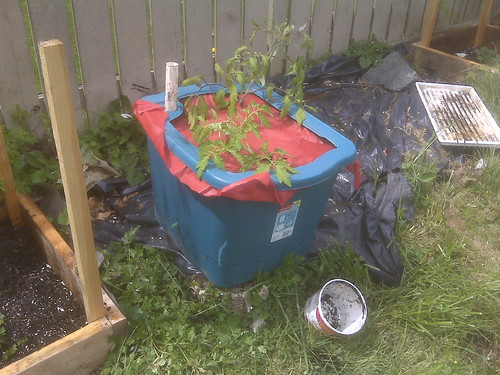
Lastly, the final two plants got put in their permanent homes on the other side of the yard (see why I can't use EG's creative siphon system). Ah drat, looking for the link on his old blog, I saw how he used landscape fabric to cover the bottom holes to keep dirt out of the reservior. I forgot to do that. Speaking of the fabric idea, it would have been good to do that, especially since I had to take time to clean out last year's SWC with all the roots and dirt that had got into the reservoir. Next year!
Also, I noticed when cleaning it up that it didn't hold up quite as well as I'd thought from last year's planting. There are several dings and scrapes on it, and it is far more brittle than I remember it. I hope these will last several years as I don't want to be making new ones anytime soon. Not that it wasn't fun, but it's a bit time consuming and costly. Anyway, here's the final tomato planting near the potato bins.

You can't se it, but the SWC is sitting on a stump from one of the dead cedar trees. The other SWC that I didn't install today that will eventually be planted with cantaloupe, will need to be leveled to sit on top of the other stump. I figure I will use bricks to raise it up on one side.
I'm not set on it facing that way. I don't like that I will have to reach over the back to fill it. I will make the final call on the positioning when I install whatever trellis setup I figure out. I may well just use Mel's configuration with galvinized conduit over rebar. It would cost some money, but hopefully not much.
Well, it's been a long post, but it's par for the course on an active spring weekend! I hope you've enjoyed the continiuing journey of my quest to grow heirloom tomatoes and maybe even save some seeds this year. I say maybe because now I don't know what I'm saving, hehe.
Enjoy your garden and week!
Things are lokking good!! Those containers really open up your available space, don't they.
ReplyDeleteLooking good! Your seedlings are doing so well, I wouldn't have thought they were started late at all.
ReplyDeleteAs to your observations on the SWC being more brittle, yep. The sterilite and the rubbermaid ones I used last year as overflow containers (not swc just regular) were very brittle by November when I emptied them. In fact, one of them I dropped while I was cleaning it and a corner actually sort of shattered. I looked it up and apparently the constant bombardment by sunlight degrades them. Here in VA, the brutal summer made it happen over one year, but other places they can last much longer.
Cauliflower - Mine are huge now (you can see if you want on the blog) but one month ago they looked like yours. For some reason, cauliflower for me starts so slow as to make you despair, then suddenly takes off like a rocket. Of course, that is dangerous too since it may not stop and bolt instead of head up. Hope you'll keep us updated on your cauli so I can see if yours does the same.
Thanks for sharing the pics!
I also wonder how long the swc's will last. I'll be thinking of something cheap, that will protect them. I definitely don't want to make more! Mine will have cedar mulch on top of the soil, as soon as I can get it done. It'll be interesting to see how the red plastic mulch does for you. Keep us informed....
ReplyDeleteCongrats on getting the tomatoes in the ground! Go, tomatoes, go!
ReplyDeleteMustards do bolt early (especially under plastic). If you are still searching for the variety you want, check out Green Wave -- it's what we are growing, pictured here: http://www.flickr.com/photos/laurenipsum/3406028940/
We've always had a lot of trouble with cauliflower, too. I've heard from other folks that it's hard. Not sure why, but our experience has been consistent with yours.
To add to what Lauren said, that photo of our mustards is a couple of months old. At present, the taller of the two is 42" tall (Lauren: We're having mustard greens for dinner again, btw) and the shorter would be taller but it's starting to collapse under its own weight. Neither is going to seed which I attribute to taking the plastic off about 4-6 weeks ago, IIRC. These guys overwintered, of course.
ReplyDeleteI am growing really, really fond of radishes as a, "Well, it's too early to plant anything here, what shall I do with the space?" crop. They harvest so, so very fast, it's great.
Yay! I was able to get my SWCs all planted up this weekend as well. Here's hoping we have a great tomato season.
ReplyDeleteYour broccoli is really starting to grow. You will be harvesting them before you know it. Should work out well as the cauliflower should be taking over just as the broccoli heads up. I am also inter planting with radish under brassica's. Good to see the tomatoes planted. I can't wait to plant mine out in a couple weeks.
ReplyDelete