Ok, I broke up these two posts to keep continuity, so read the April 11 post below (yes, written on the 12th, but who's counting?).
Now for the post I've been waiting for months to write... Saturday SWC day! That's right, my wife and I got together with another couple who are good friends of ours. They garden too, and were intrigued by my Self Watering Containers. They have a concret patio area below their second-story deck that they have some potted plants on, but they wated to uses SWCs to grow tons of tomatoes along with the rest of their edible garden goodies!
So, over the last few months, I've been collecting the materials to make 8 SWCs. Last week I finally had everything (I thought) and we set Saturday afternoon to build them.
I tried to let the ladies do the inside work so they could chat, play my wife's new Wii Fit and drink tea. Here is the start of the process where we marked the cut mark for the aeration bench.
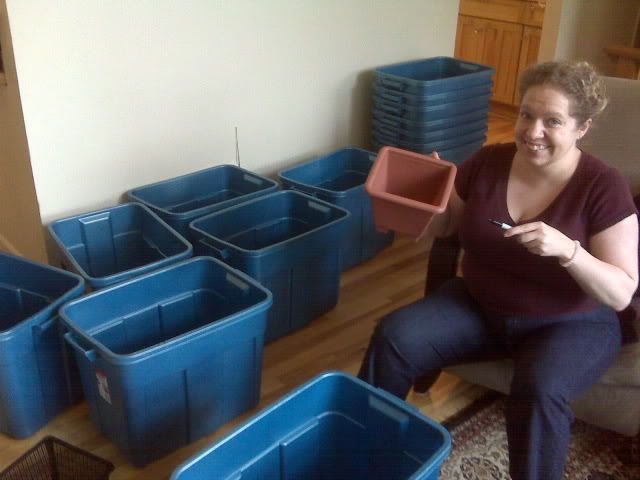
And yes, that's my dollar store find for the wicking baskets. I just drilled a score of holes in it with a 1/8th inch drill.
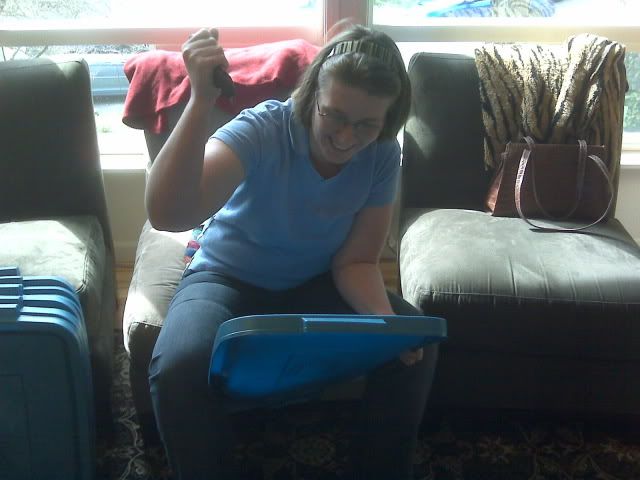
No, this isn't a pictue of my wife cutting the tops, but they thought it would be funny to get this pic. Frankly, the one of her cutting was blurry and boring, so you get the fun one. Yes, we had tons of fun.
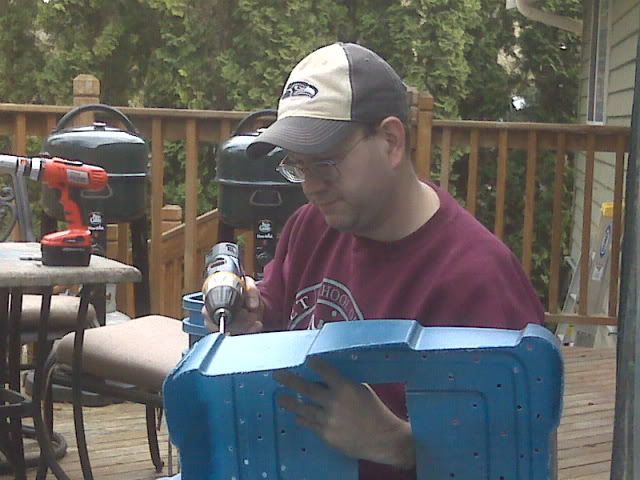
It was really fun trying to assign tasks to folks while floating around doing little tasks necessary for the project. Here I am drilling the holes while they played Wii.
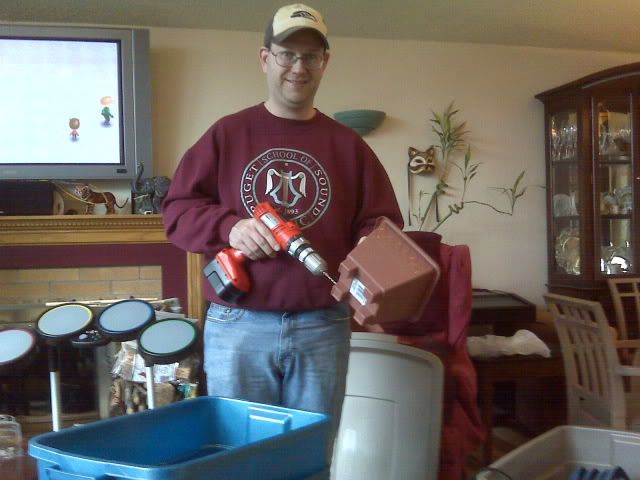
Outside, my best friend and I tackled the heavy cutting with jig saws and drills.

Here he is cutting out the holes for in the aeration bench for the wicking baskets. If you can see, I followed the new Earthtainer (TM) instructions where you cut the opening smaller than the size of the wicking basket to limit the amount of wicking to stop overwatering. It worked very well.
In the background you can see their mini-greenhouse shelf system where seedlings are hanging out, and the herb planter boxes. Also, you can see the scraps behind him that we will use as mini-raised beds like Judy suggests in her instructions, though for safety purposes, I will put the top up and the sharp end down for my kids gardens. By the way, on one of our hardware store runs (every project needs two at least, hehe), I found Atomic Red and Solar Yellow carrot seeds for my kids to plant in their own 2 SF gardens! Now to find where to put them. Maybe behind my new blueberries.
Here is a good progress shot on the aeration benches. One with all the holes drilled and cut and the others just starting the process. It's coming along nicely at this point.
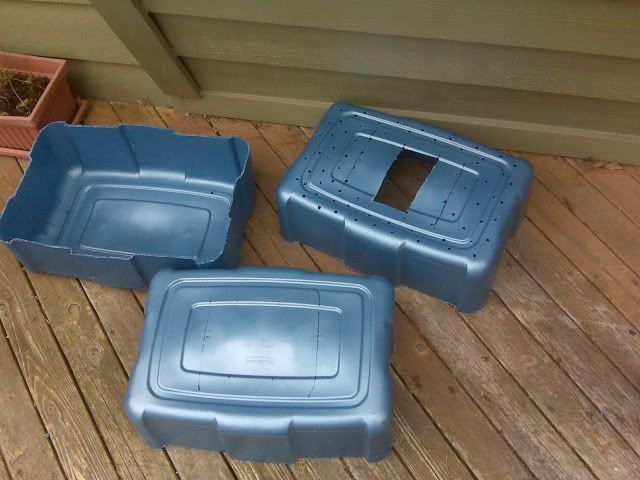
We had a bit of a problem cutting the hole for the fill tube. The corner of the bin kept shredding. Thankfully never bad enough to scrap the piece. That's good because we didn't have extra bins, hehe.
Ah yes, we were very proud of our fill tubes. I had brought my handy dandy pipe cutter which cut the 1 inch pipe into roughly 2 foot sections. However, to allow water to freely flow out of it, it needs to be cut at an angle. Here was our brainstorm solution...

By placing the edge in the grove of the pipe cutter, it effectively sliced the corner off the pipe.

Lookie how well that turned out! Now the water will flow nicely.
Here is some of the finished products...
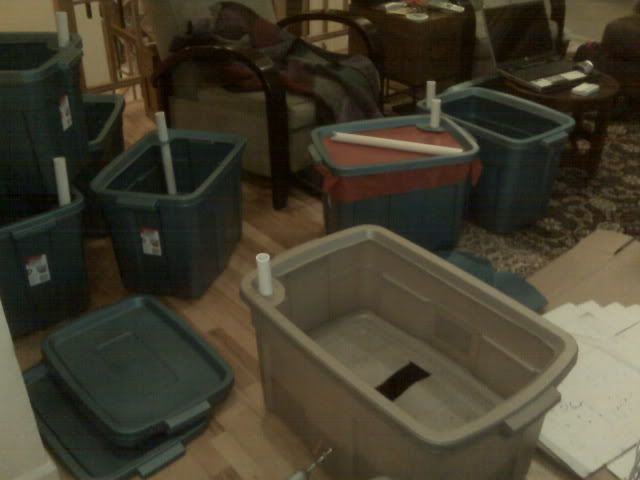
Of note is the red mulch that I picked up from Territorial Seed when I bought my seed order this year. It is supposed to help increase tomato production 12-30%! So we cut pieces for each of the bins. Also, you can see my finished cantaloupe bin. Not sure if red mulch will help there, but we had it so we cut it anyway.
So, it may have taken 6 hours, but we had one heck of a good time. And as I said more than once yesterday, we only have to do this once since if they're put away at the end of the season, they should last many years!
I hope this encourages you to build some SWCs and try them for tomatoes, if not plan a massive SWC building party. It was extremely enjoyable and I would do it again... to bad we don't need to.
Enjoy your garden!
What an awesome idea for a SWC building party with friends :-) Yours look great! I think it was probably a good idea for you to limit the water intake in the SWC because of the amount of rain that you get every year. Cool idea to use those pots for your baskets too.
ReplyDeleteI can't wait to see them all potted up!
I am not into SWCs it looked like a fun project. You lost some weight, looking good it must be the fresh veggies.;o)
ReplyDeleteJohn
That was a happy group of people working hard! Looks like they turned out nicely and you are now good to go for the season. I think I am going to stick with my more traditional tomato growing techniques - but I found it interesting to see how these are constructed.
ReplyDeleteLooks like a fun day, for sure! I had my party by myself...well, Jude was there. Anyway, great find/idea on the wicking baskets. They should work very well. Oh! You never told me if you wanted any seeds with your package. Let me know, cause I'd like to send it out to ya this week.
ReplyDeleteVery interesting. Looks like you guys had fun and it's so great that you could work on a big batch of them with friends. Can't wait to see photos of them overflowing with veg.
ReplyDeleteI think I'll stick to terracotta pots though in my garden, I just can't bring myself to put rubbermaids outside with plants in them. And I'm not a big fan of self watering containers.
Nice idea to make a group project together! I built 3 ETs all by myself last week\weekend and it was rough. Of course I made it harder on myself by using threaded rods and wood blocks for extra support for the ability to use detachable cages. If you build another and go that route be prepared to do ALOT of twisting. I think I did so much I could teach an instructional class to a group of people on constructing these.
ReplyDeleteI forgot to mention that I used bright red cloth for the cover last year, also. I had it, and free is a great price. I'm thinking this is a great idea. I wonder if I could host some kind of party like this next year...
ReplyDeleteLooks like a fun event. I am growing those atomic red carrots, they are supposedly more vitamin rich. I wonder if the red mulch has anything to do with reflecting the red end of the light spectrum up into the plants.
ReplyDeletePerfect timing as we are going to build our SWCs this week. I've also got some red mulch for the SWCs. Let's hope it works!
ReplyDeleteLooks like a fun day. A suggestion: I found using a soldering iron burned nice holes in plastic pots much easier than using a drill.
ReplyDeleteGood times!
ReplyDeleteWe installed all the tomato bins along the stairs down from the deck, used twine to attach them to the stair railing, and plastic cable ties to bind the cages to each other. looks pretty stable!
We put a couple of the short halves in between, to plant with radishes, carrots, and parsnips, and of course some petunias and pansies to attract polinators for the tomoatoes. You folks will have to come out and see. :)
It was fun. Can't wait to see everything fruit!
Cute pic of my DH btw. /swipe
Came back to this because after ten years we have to make them again. They are falling apart from decay in the elements.
ReplyDelete